
To create your own PKI (Public Key Infrastructure), download and install the XCA application from the manufacturer’s website. This XCA application is intended for the creation and management of X.509 certificates, certificate requests, private RSA, DSA and EC keys, smartcards and CRLs. All CAs can recursively sign sub-CAs. These certificate chains are clearly displayed. For easy company-wide use, there are customizable templates that can be used for certificate or request creation.
Notes on setting up a company structure #
In a company, a Root CA and corresponding Sub CAs are often created, which can then issue and sign server and client certificates.
The creation of such a structure can also be mapped with XCA. XCA can be used as follows.
A correct structure is therefore necessary to ensure the so-called chain of trust, i.e. the trustworthiness of the entire certificate chain from the server certificate back to the root certificate. The structure and signing is described in the following image (https://en.wikipedia.org/wiki/Chain_of_trust#/media/File:Chain_Of_Trust.svg)

Creation of the Root CA #
To set up such a structure, we start by creating a root CA in XCA. To do this, first open the application and create a new database. (File → New database)
The database should be provided with a secure password to prevent unauthorized access.
Creating the root certificate #
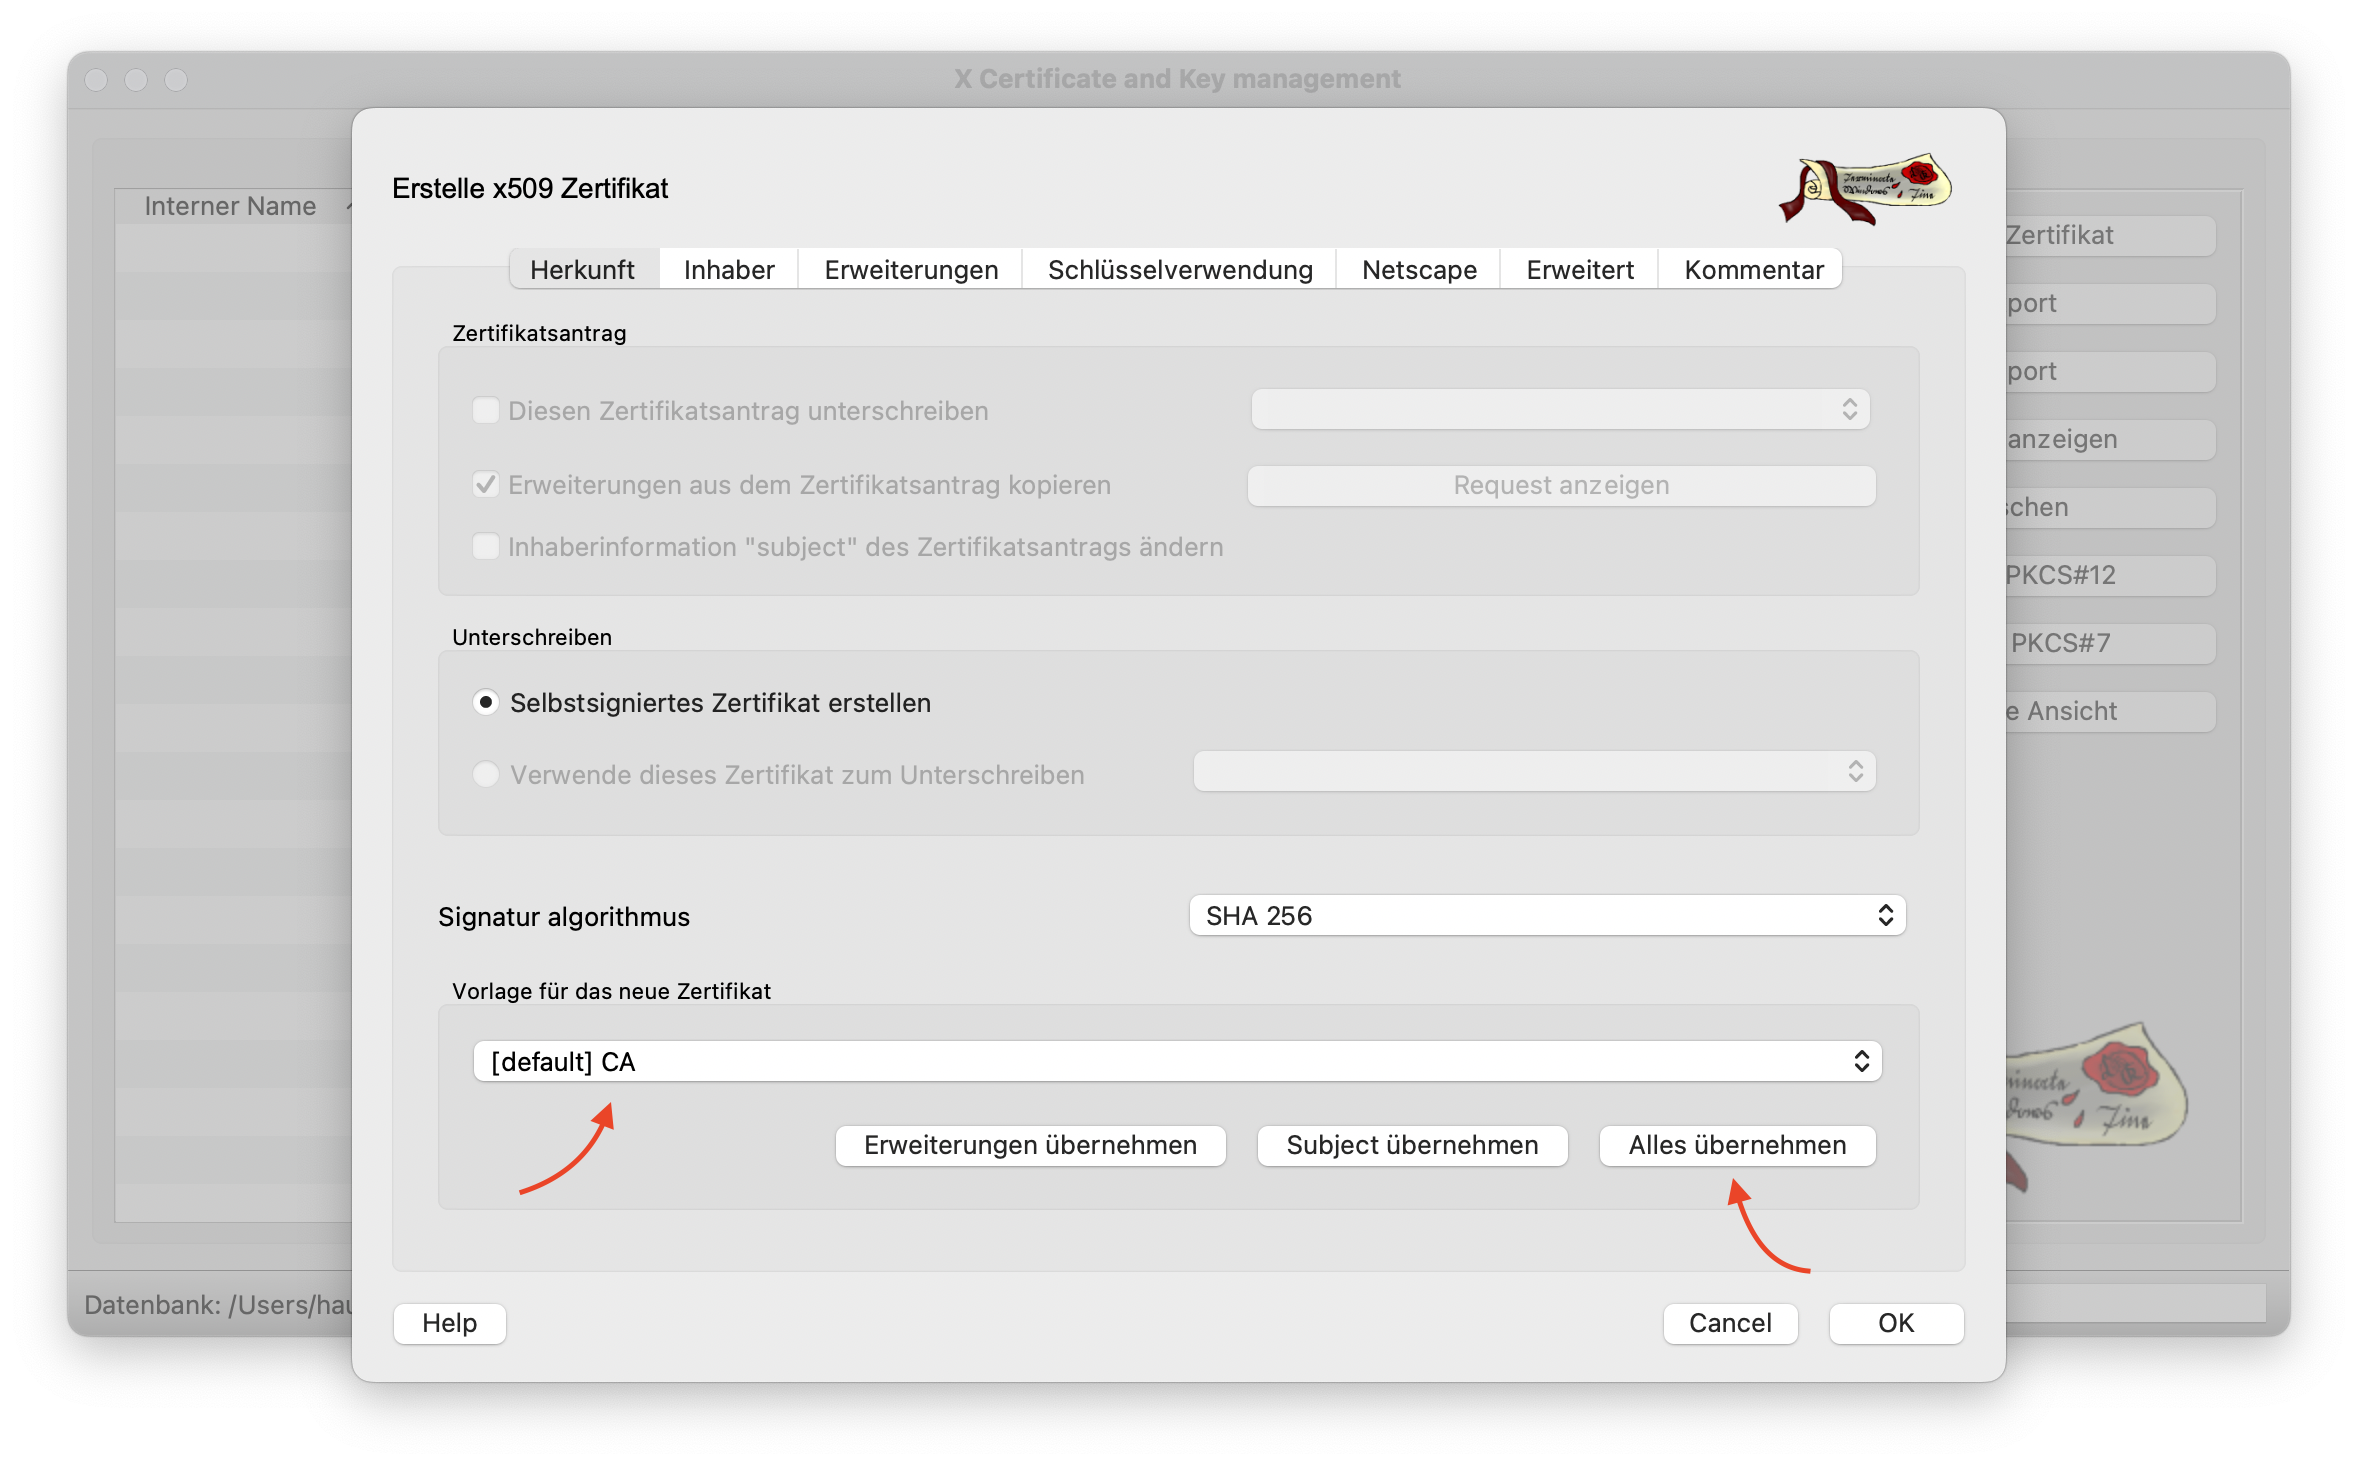
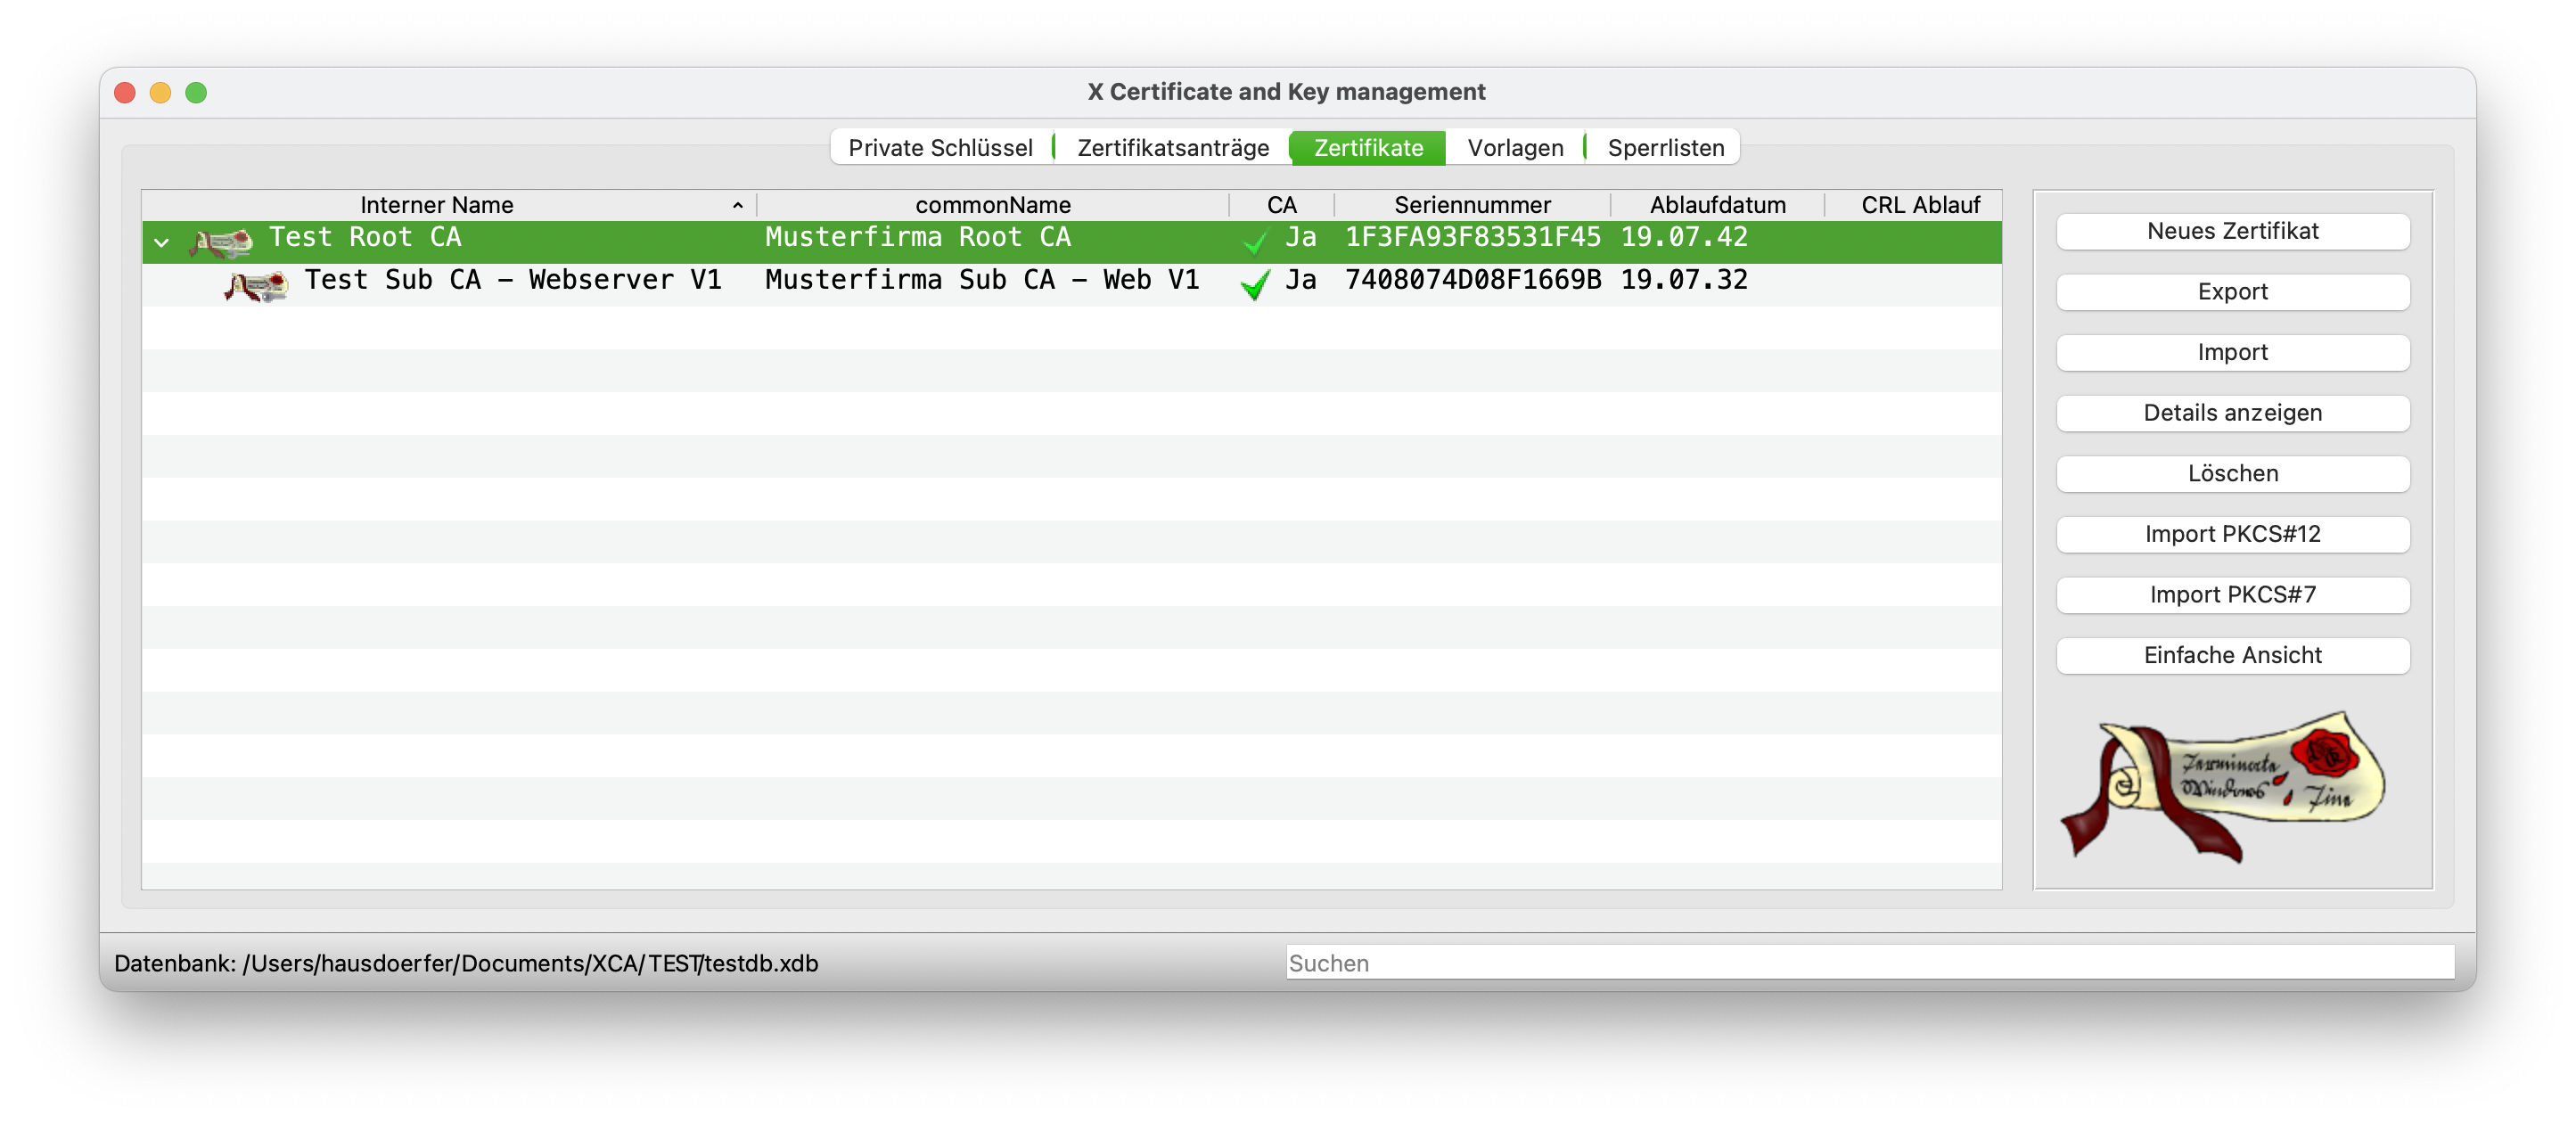
To create the root certificate, a new certificate is generated in the Certificates tab using the New certificate button.
In the dialog, first select the default template for a CA and click on Apply all. This sets the default settings for a root CA certificate.
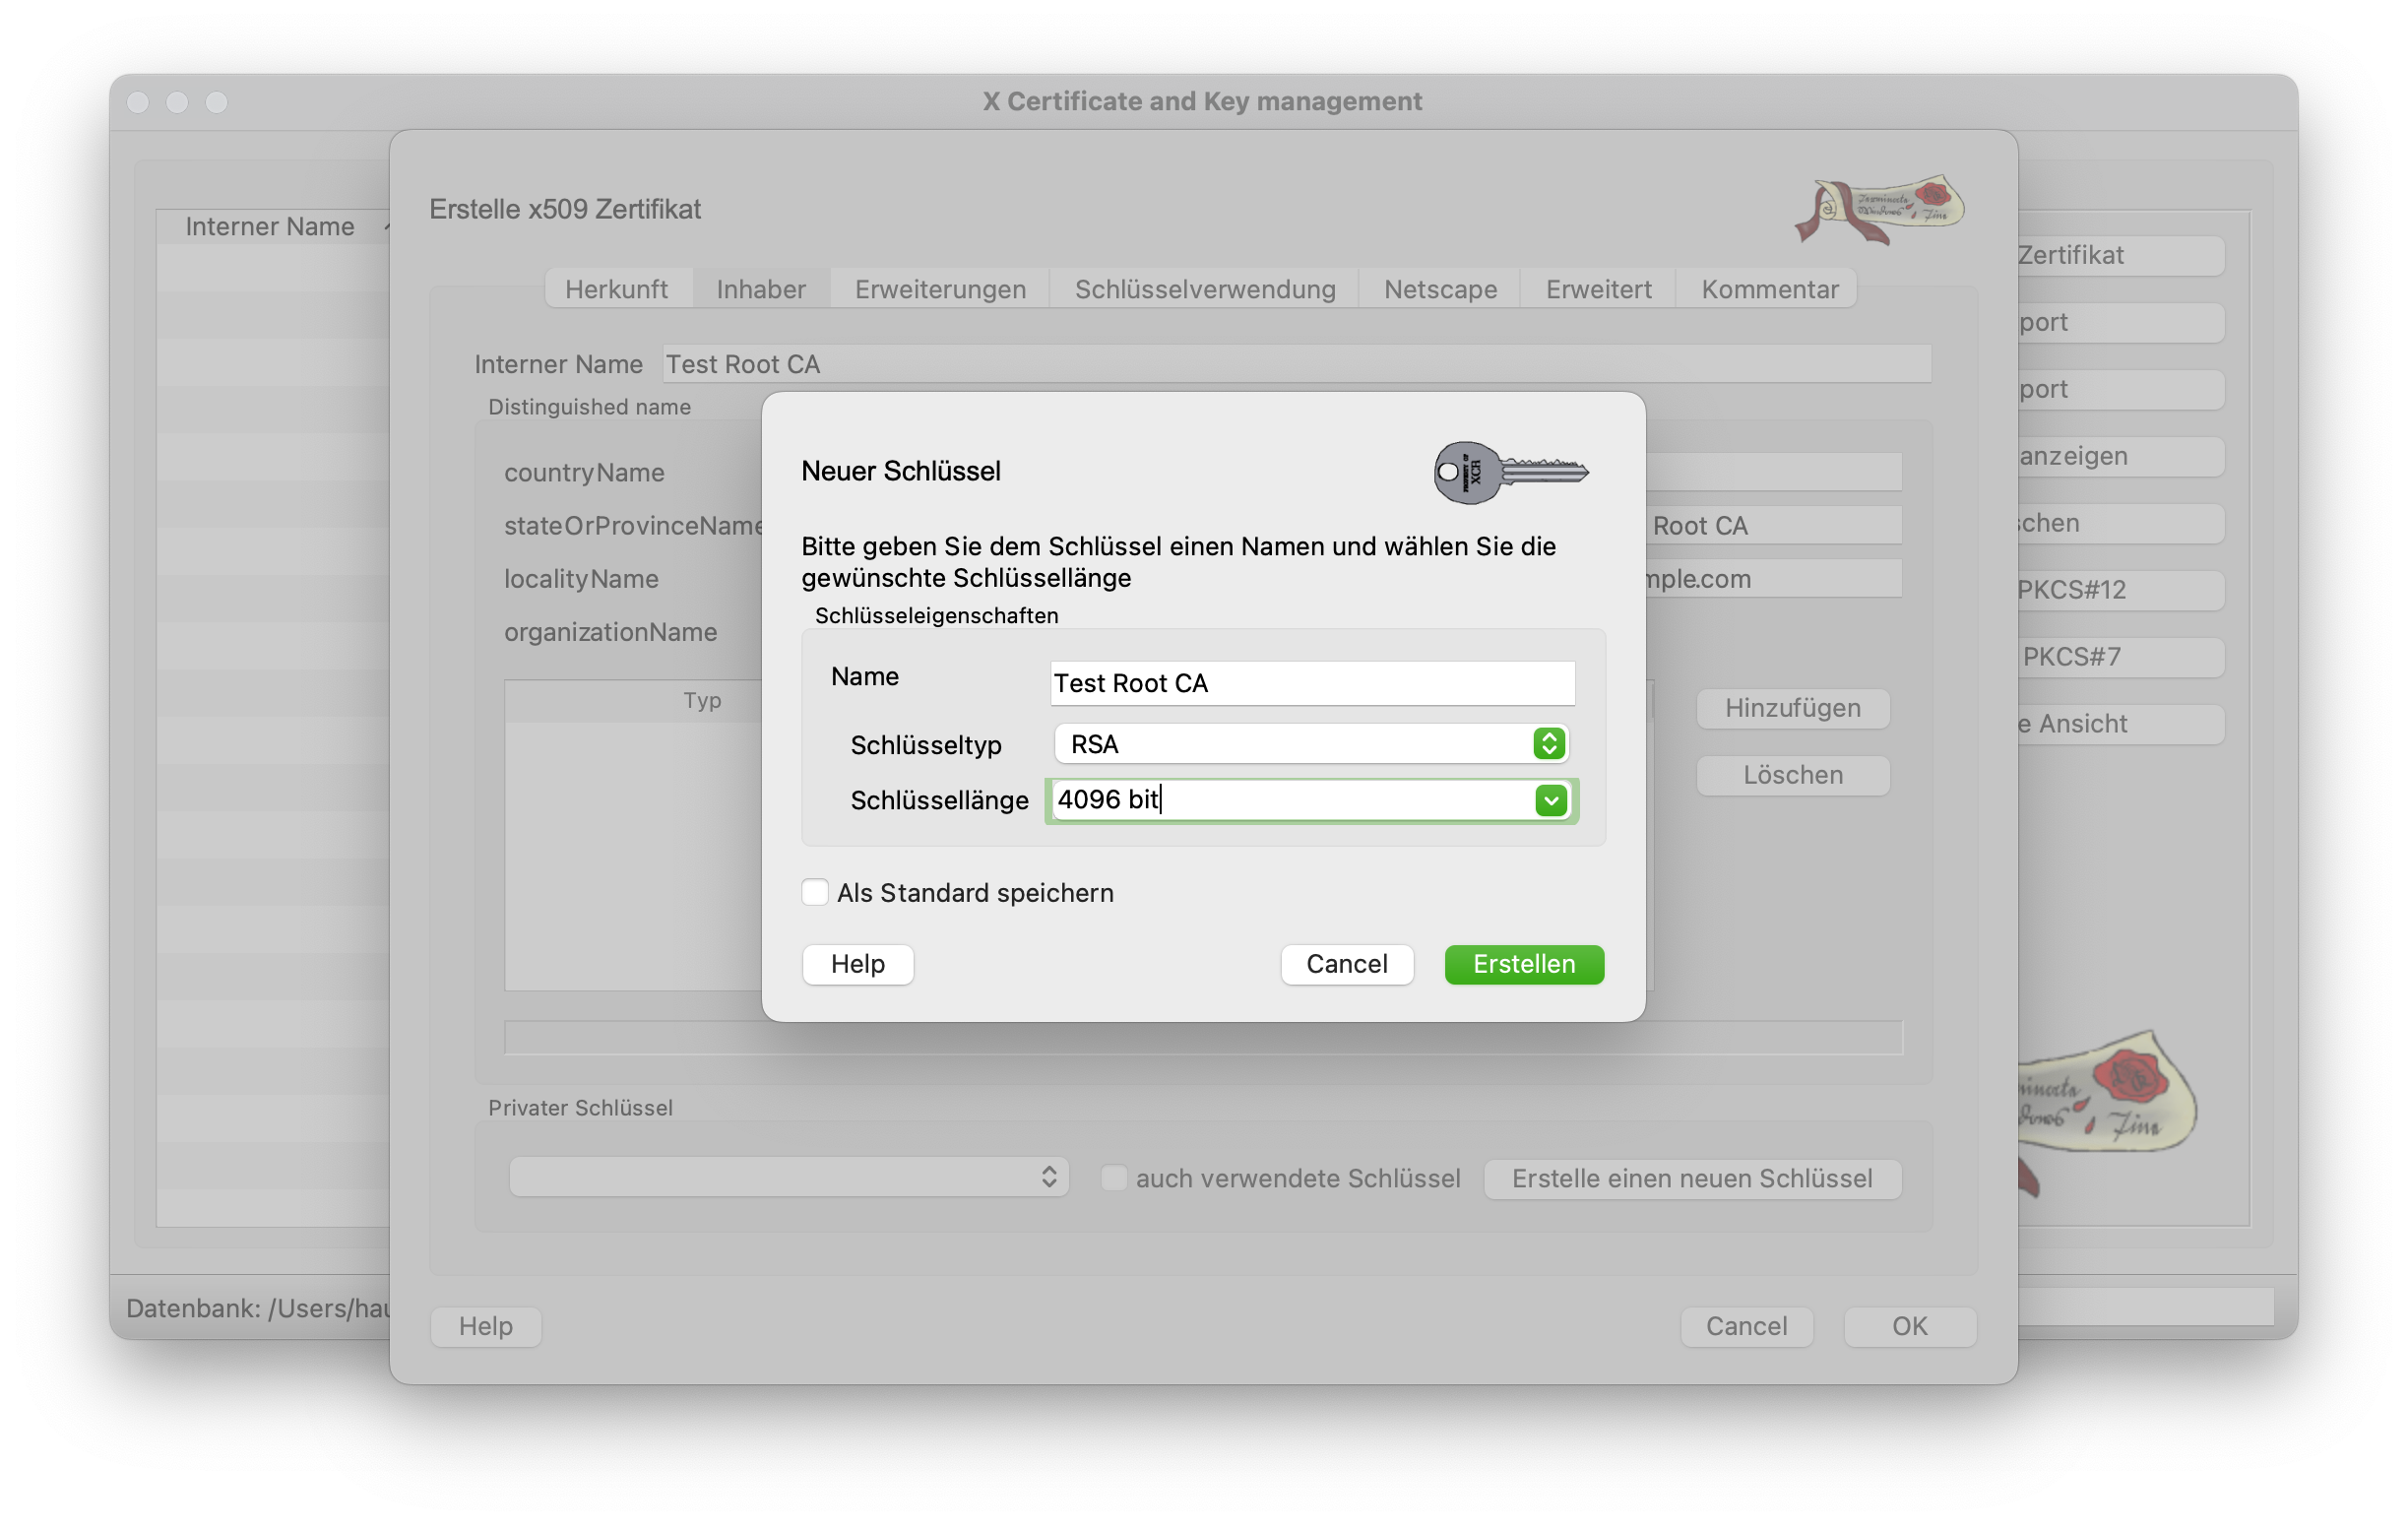
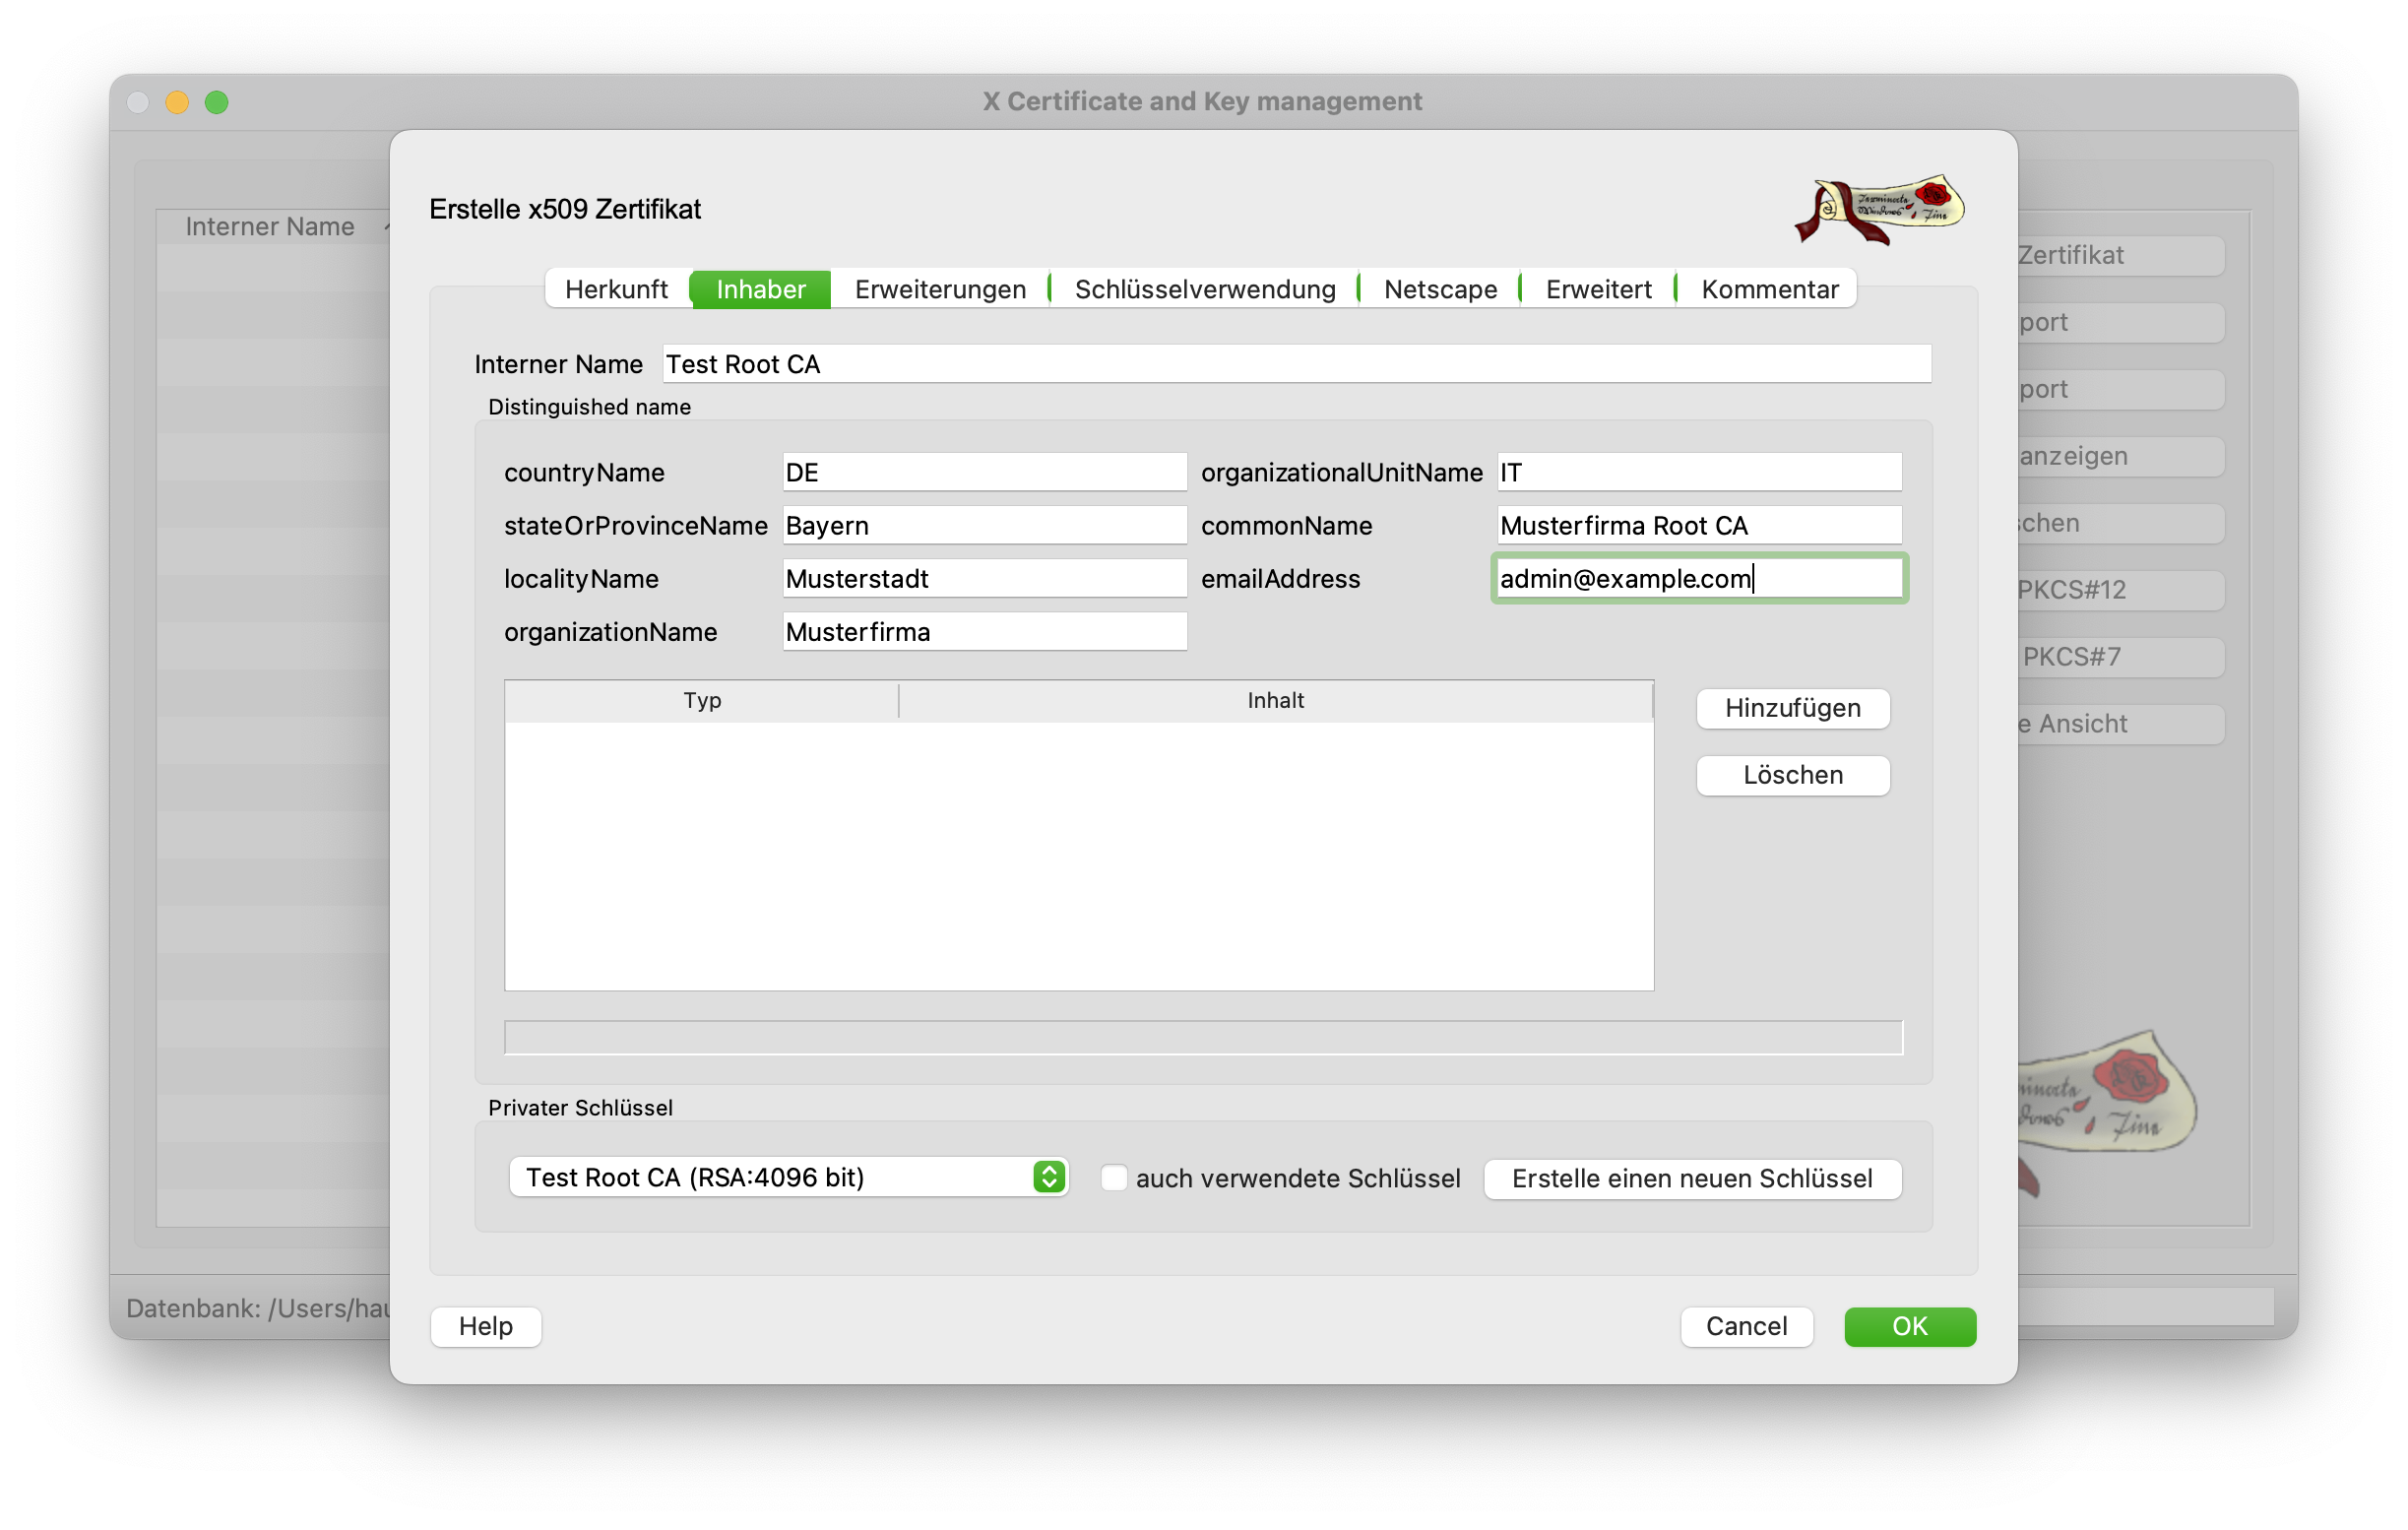
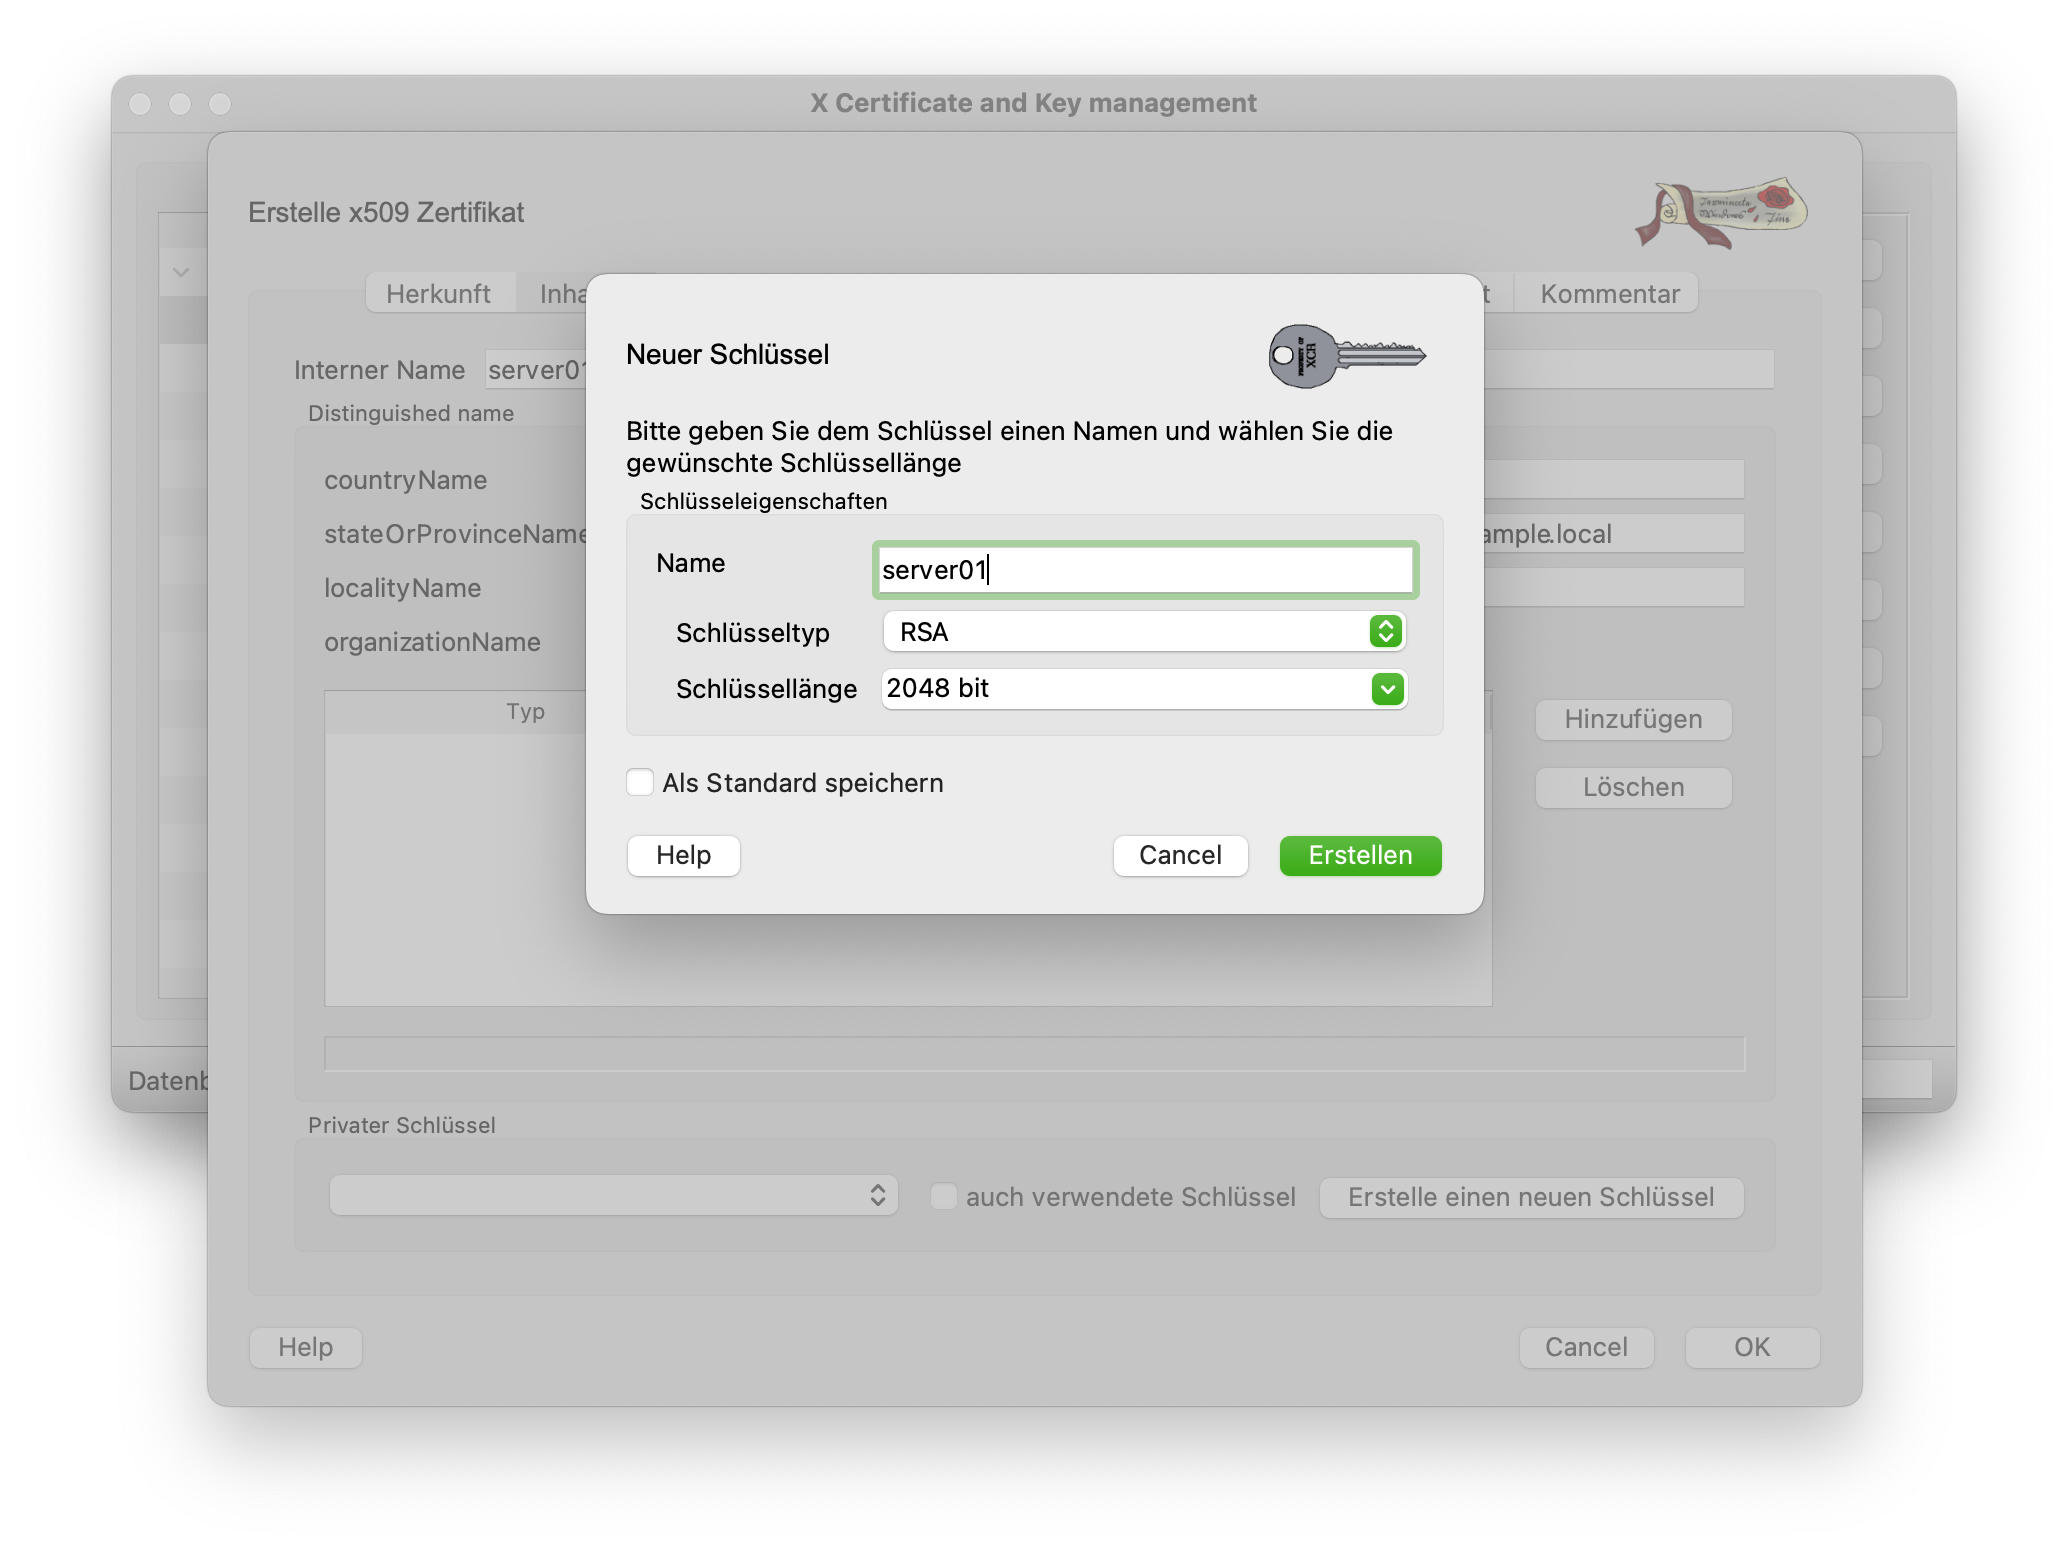
Switching to the Owner tab takes you to the other settings in the certificate. All fields should be filled in as shown in the screenshot below. The Common Name is particularly important here. This contains the FQDN (Fully Qualified Domain Name) of the server. In this case, however, we do not yet have this name and therefore enter the name of the root CA. Before moving on to the next tab, a new key is created for the CA. This should be 4096 bits long.
The Extensions tab can be left as it is. However, you should think about the period of validity of the certificate here. The default is 10 years. As a rule, however, root CAs are valid for 15-30 years, as a quick change of root certificates is hardly possible or only possible with great effort. The value should therefore be adjusted / increased slightly. The period is only really applied when you click on Apply.

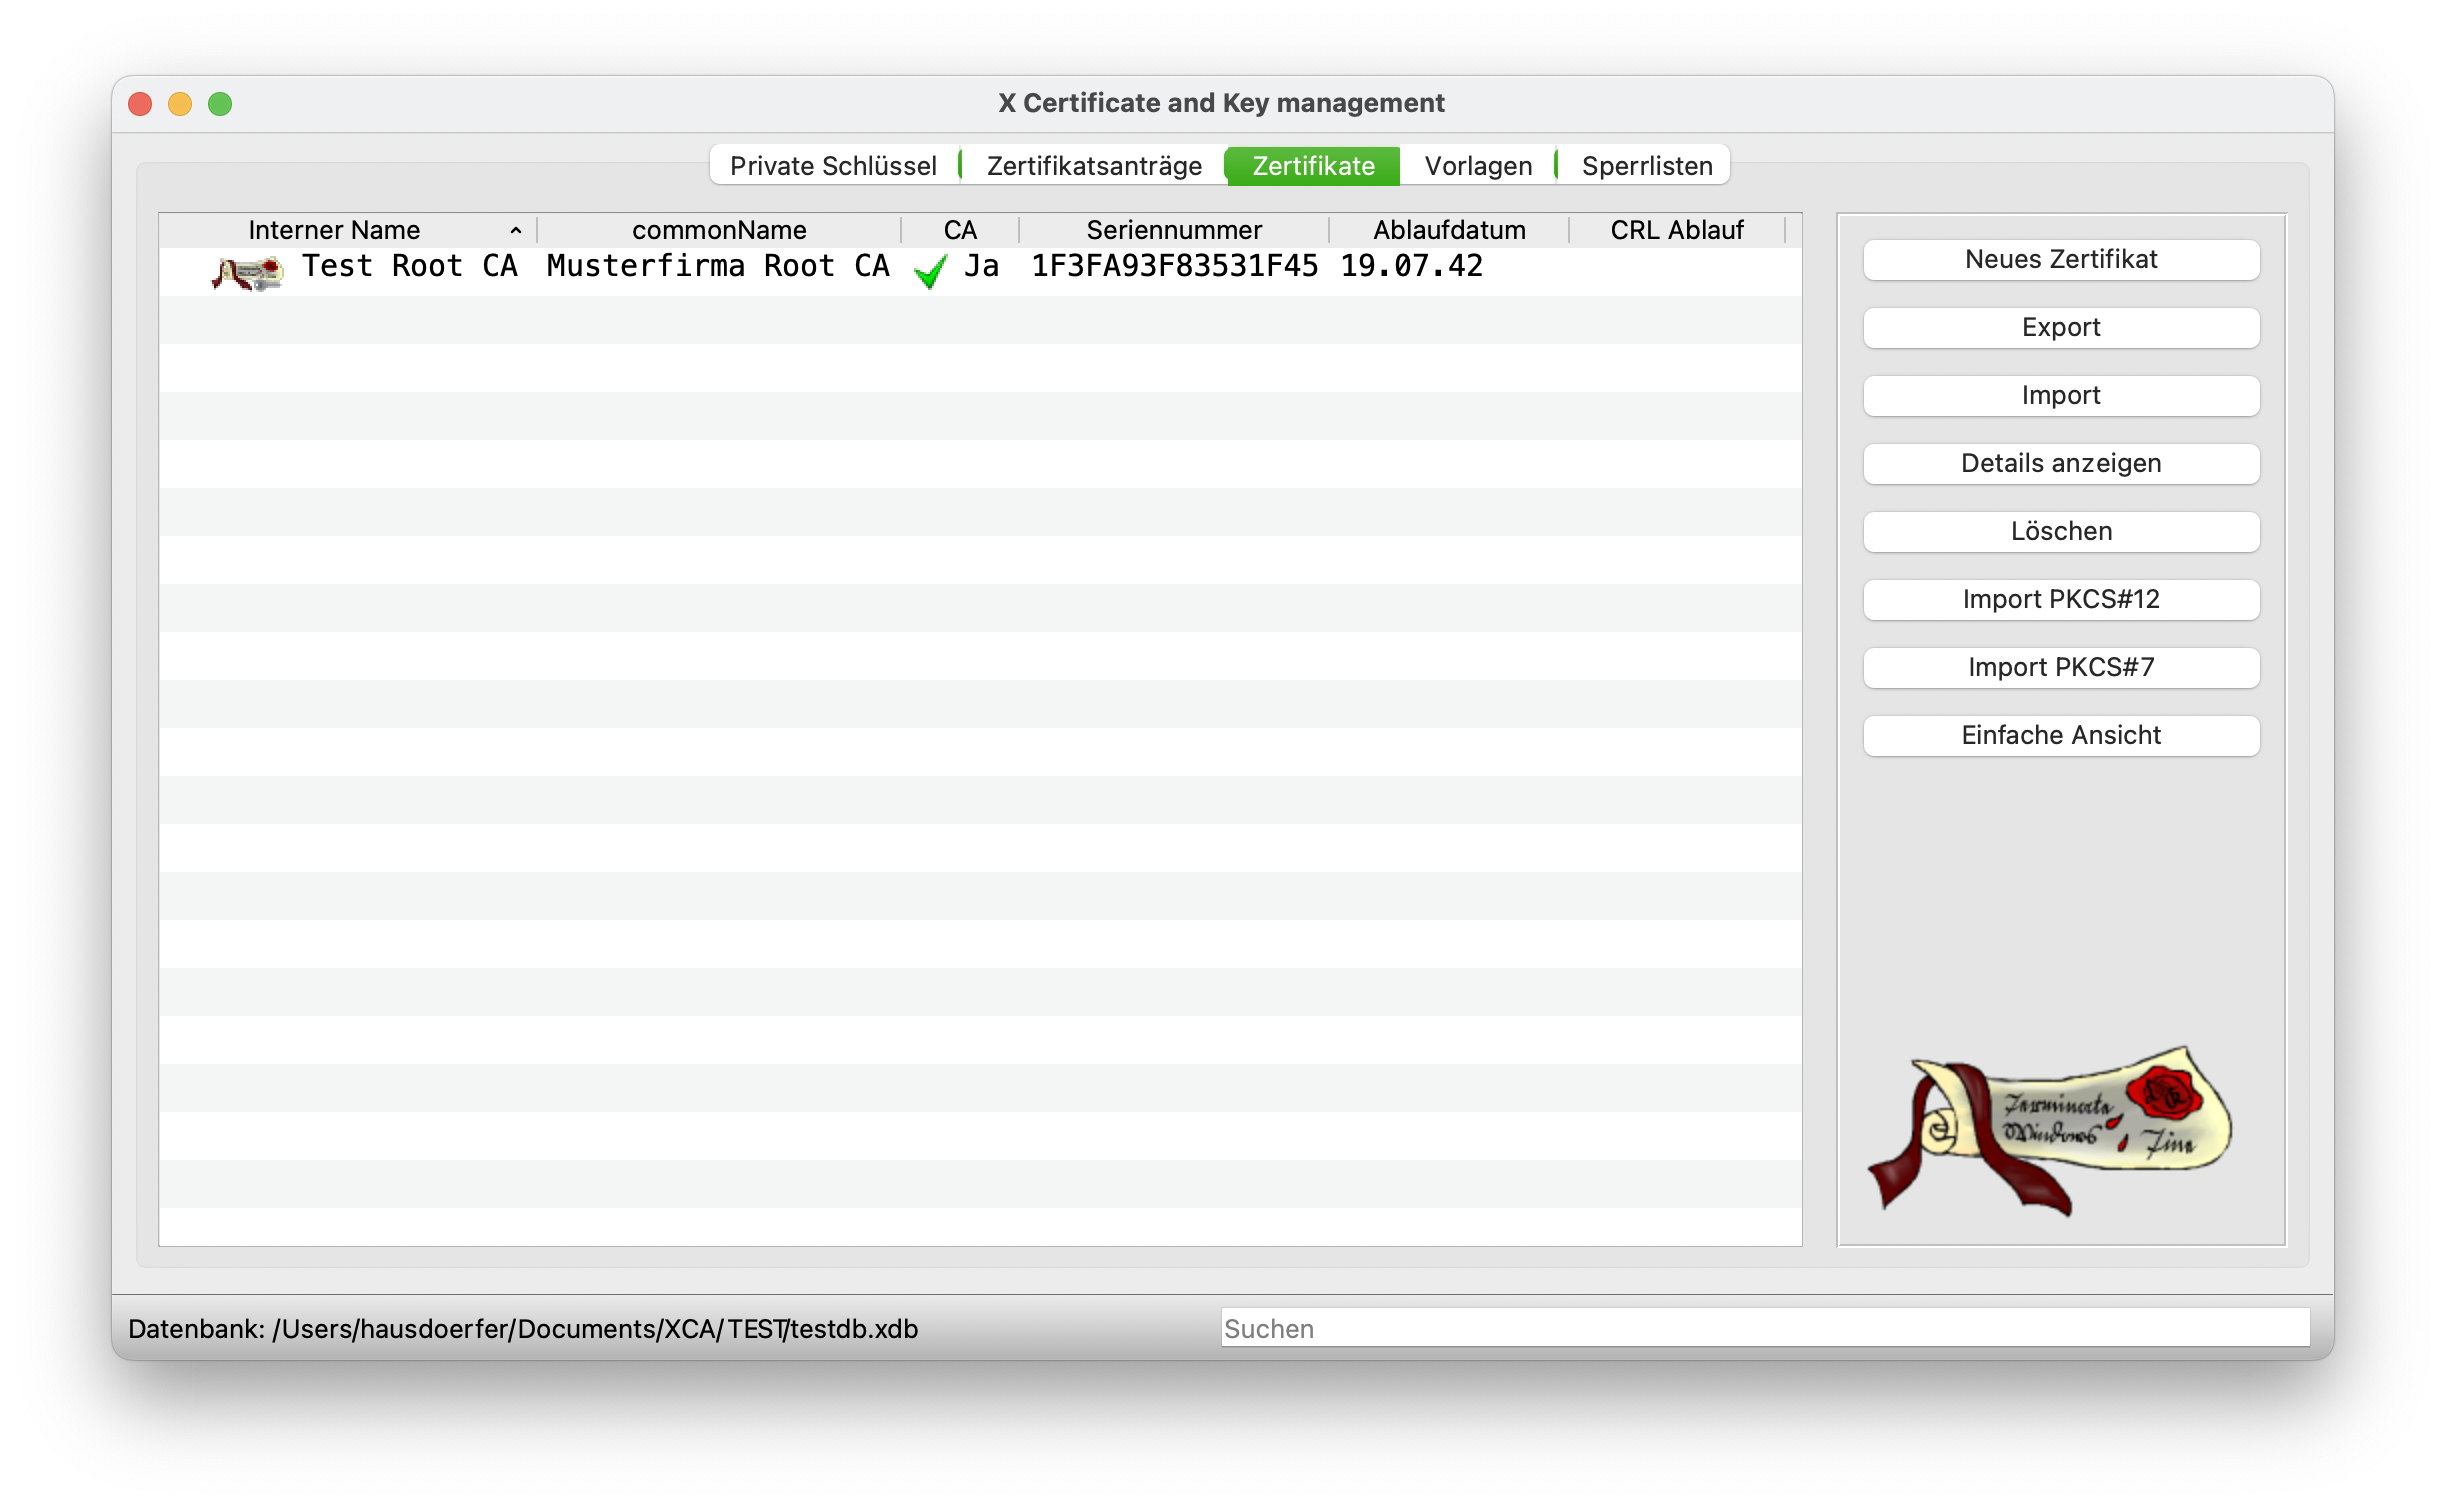
All other tabs are already correctly preconfigured and do not need to be edited further. Finally, click on OK to issue the certificate and it is valid from then on.
Creation of a Sub CA - Intermediate Certificate #
An intermediate certificate is used to issue web server or client certificates at a later date. The SubCA certificate is signed by the Root CA. The issuing process is therefore very similar, which is why the Root CA can serve as a template here.
Creating the sub certificate #
A new, similar certificate can be generated by simply right-clicking on the root certificate.
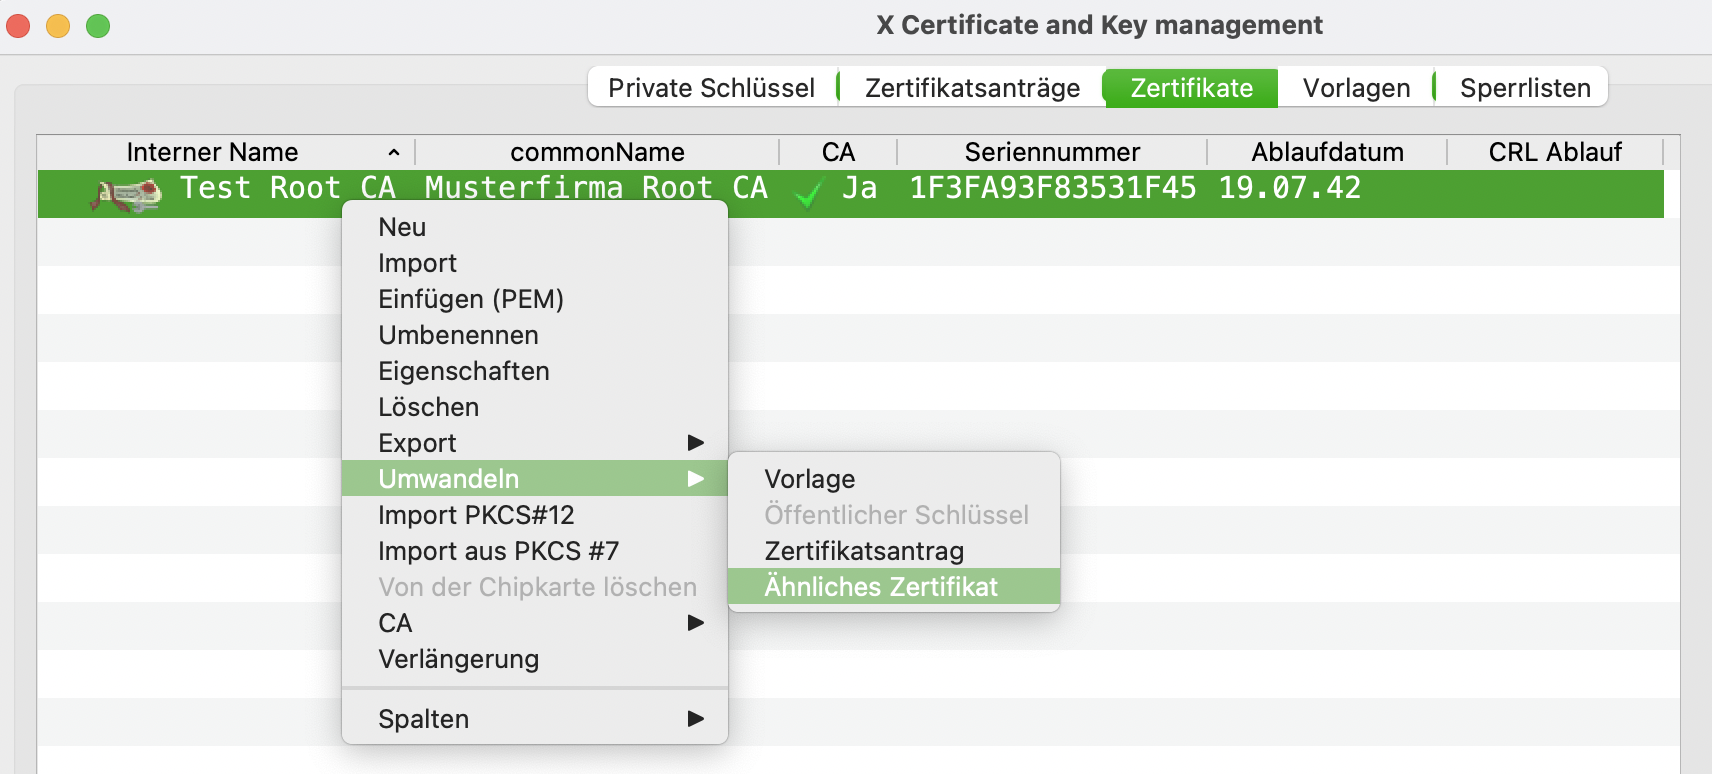
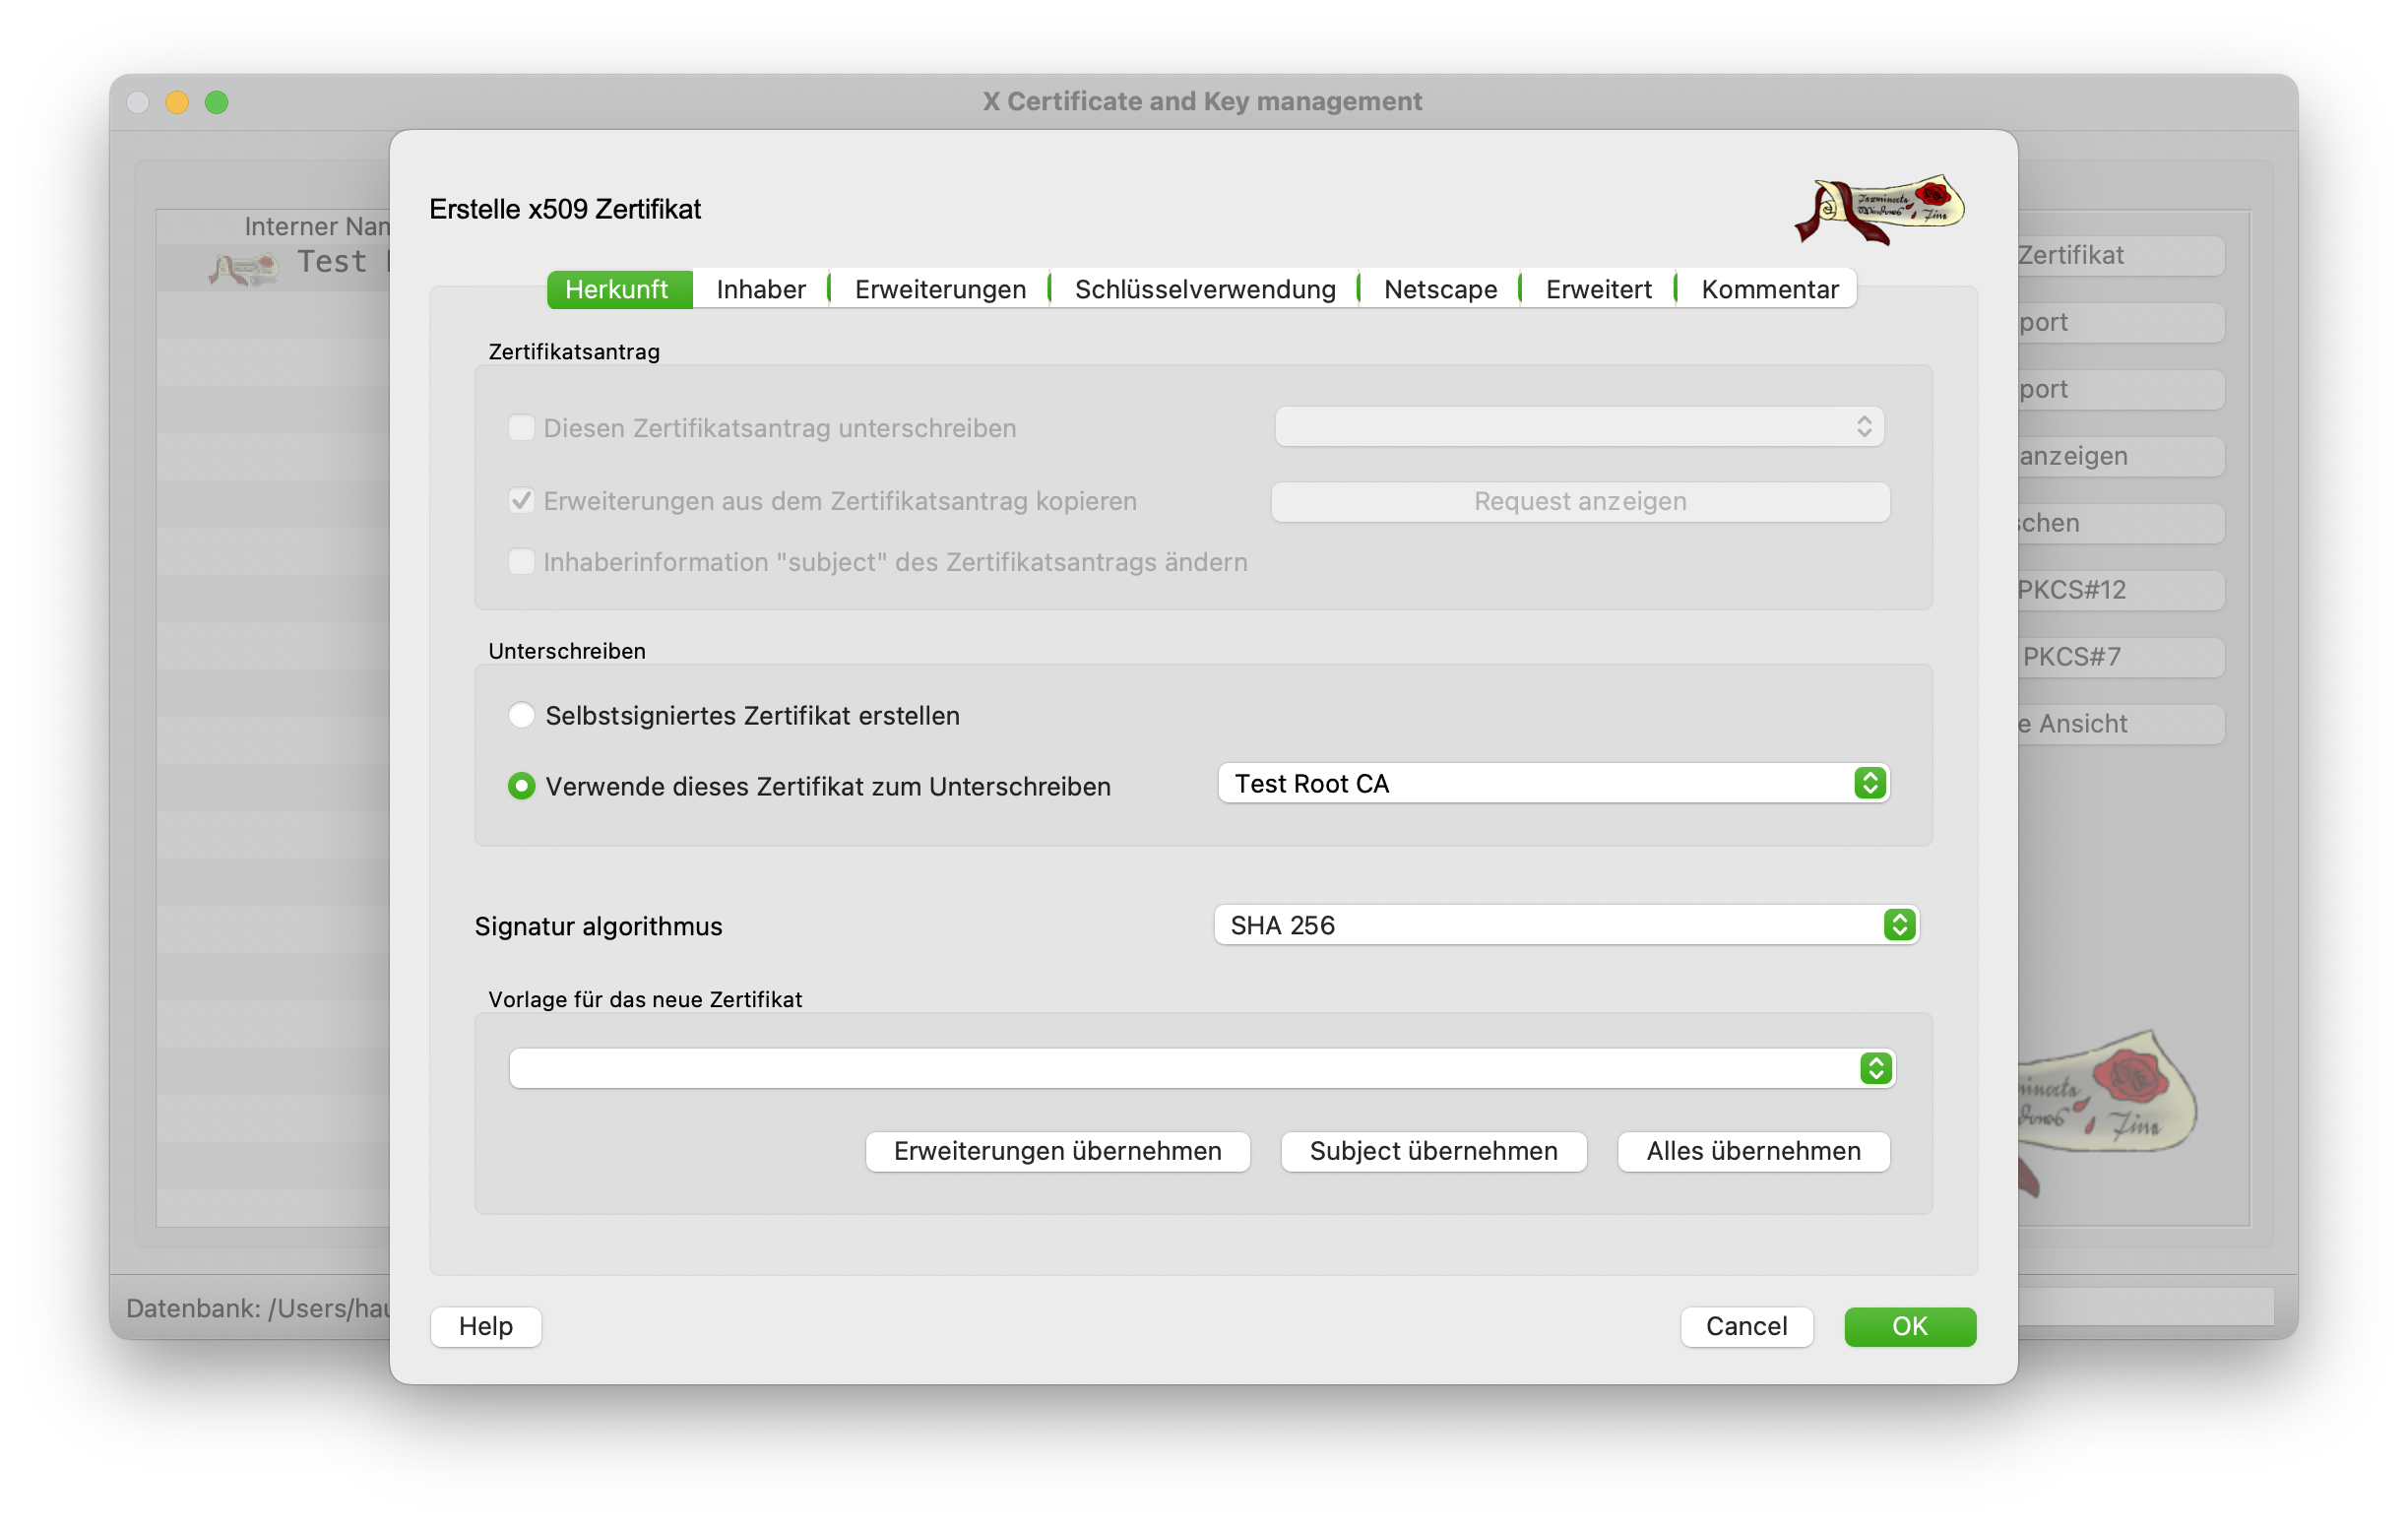
The issuing dialog then opens again. First select the Root CA as the signing certification authority and then switch to the Holder tab. A template does not need to be applied as we are already using the root certificate as a template.
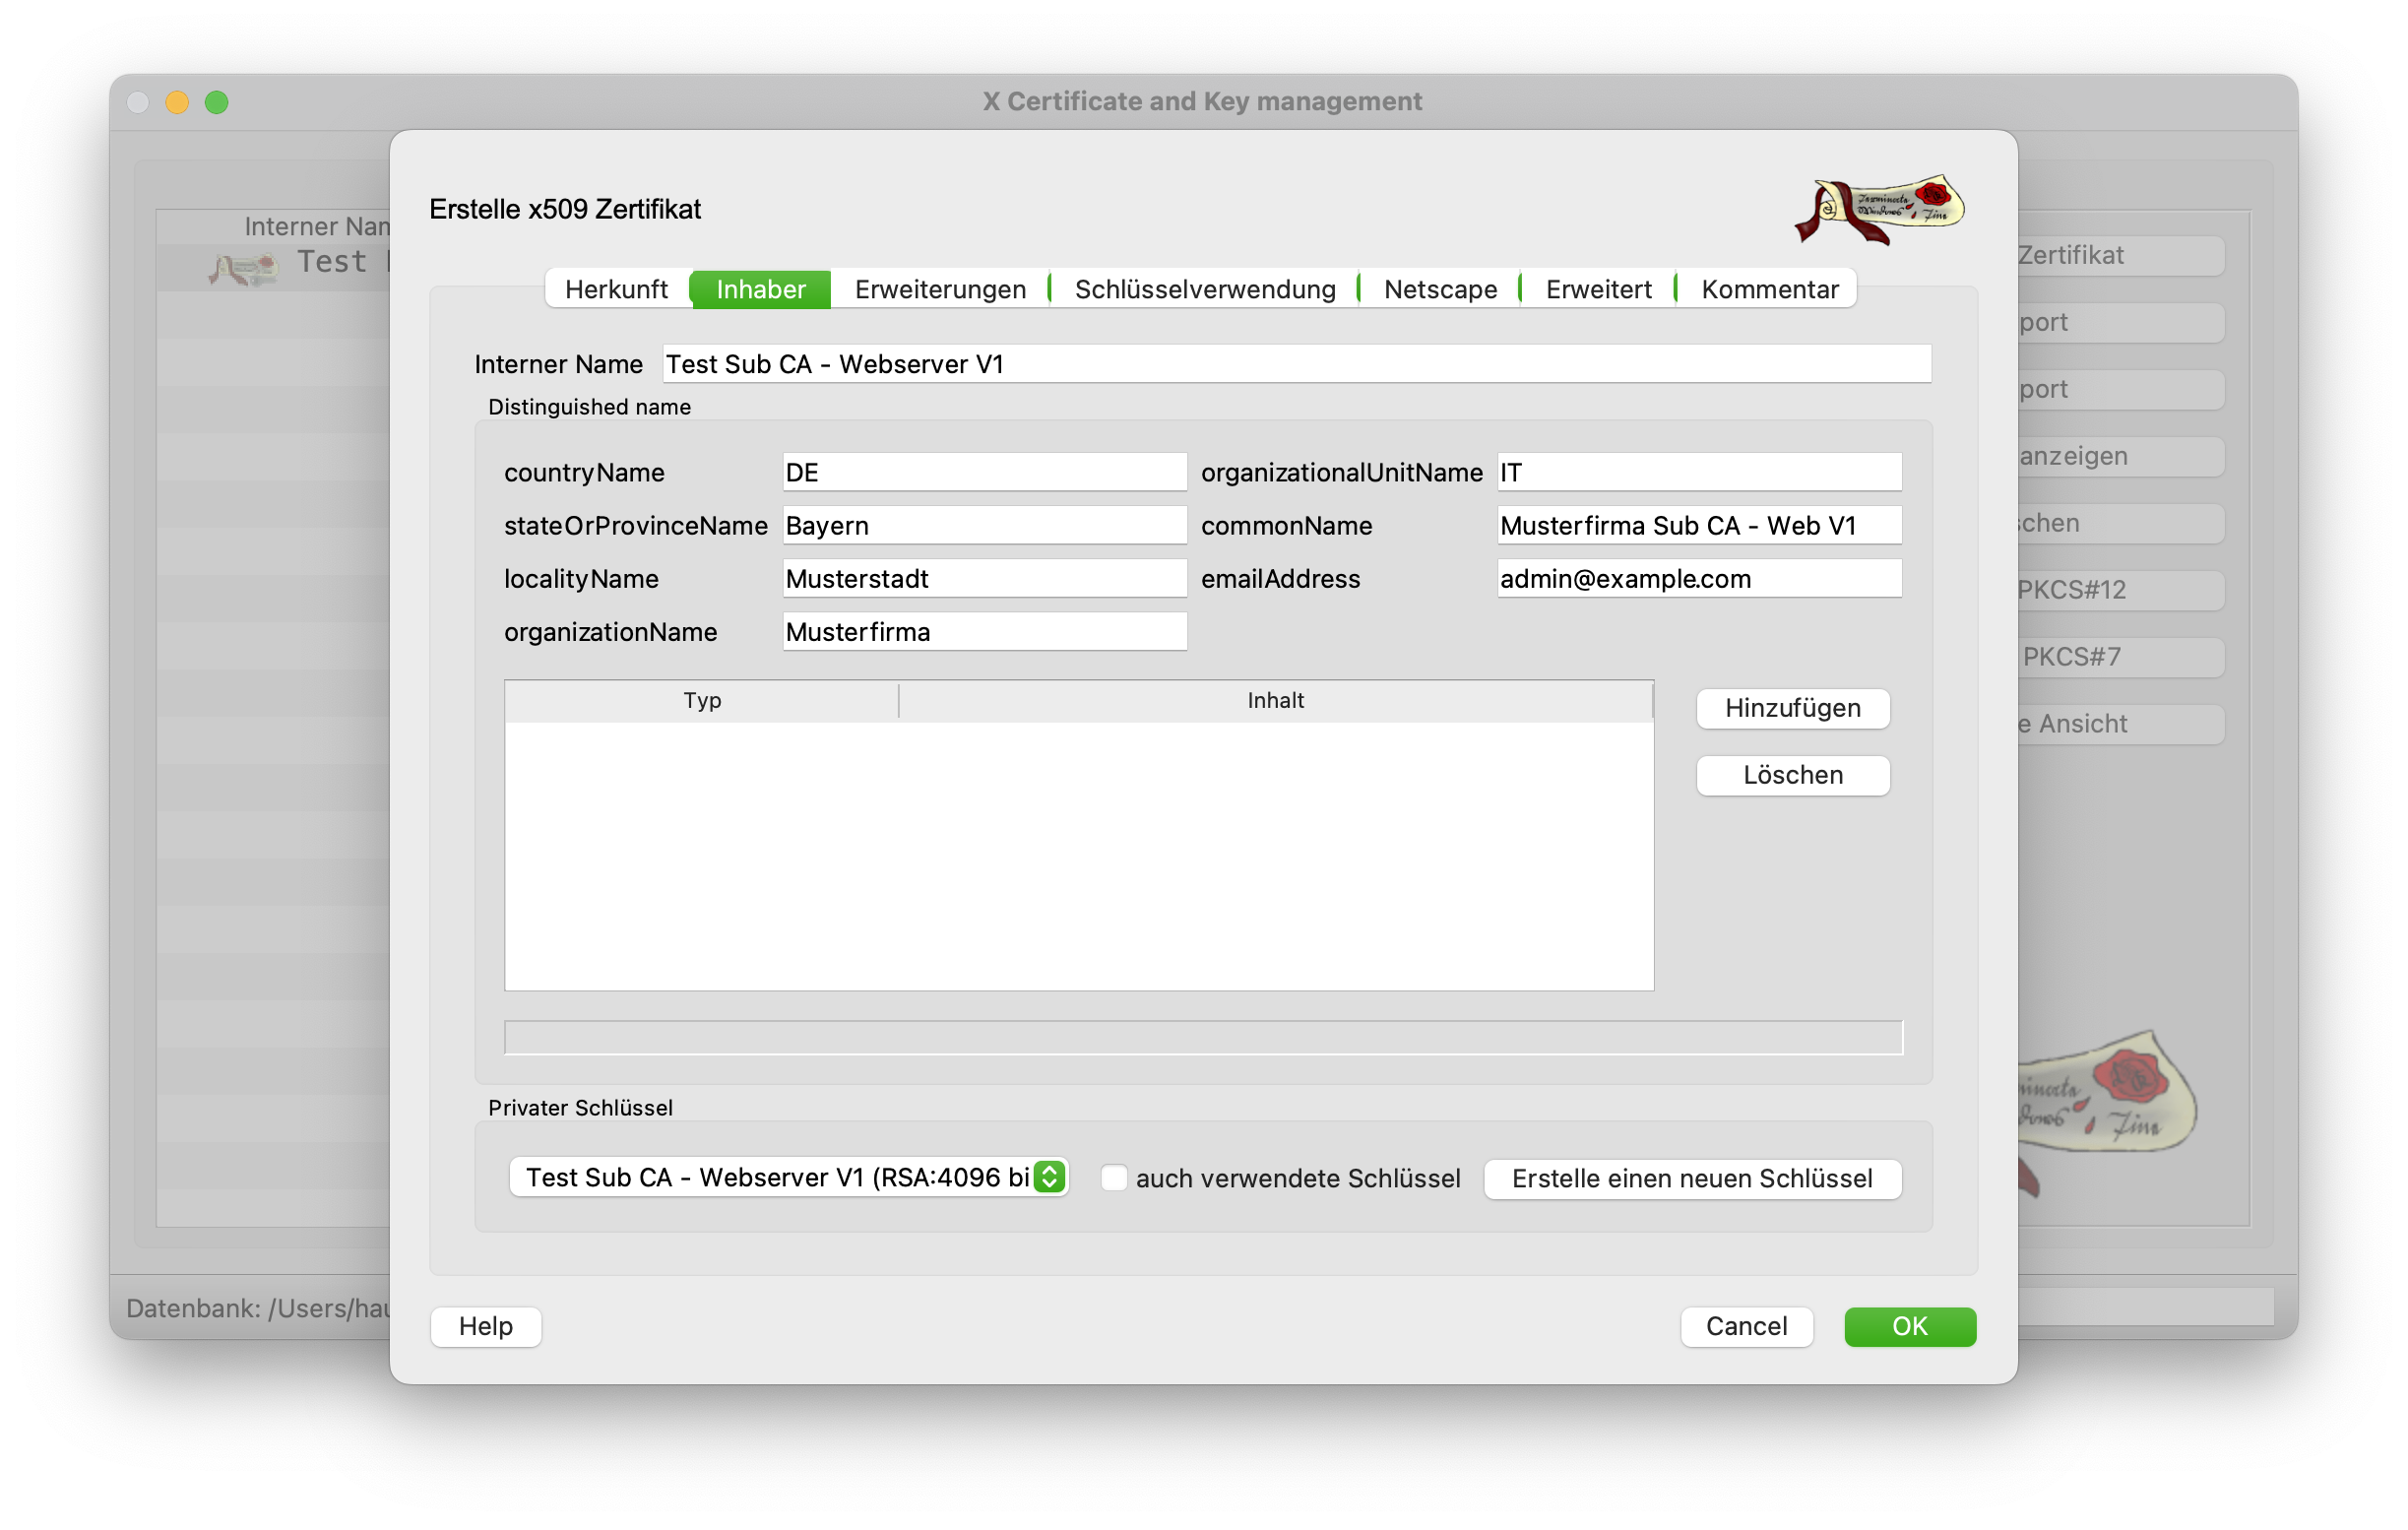
The internal and common name is then adjusted in the Owner tab. Here it is advisable to specify the Sub CA directly and include a version number. Again, it is important to generate a new key with 4096 bits.
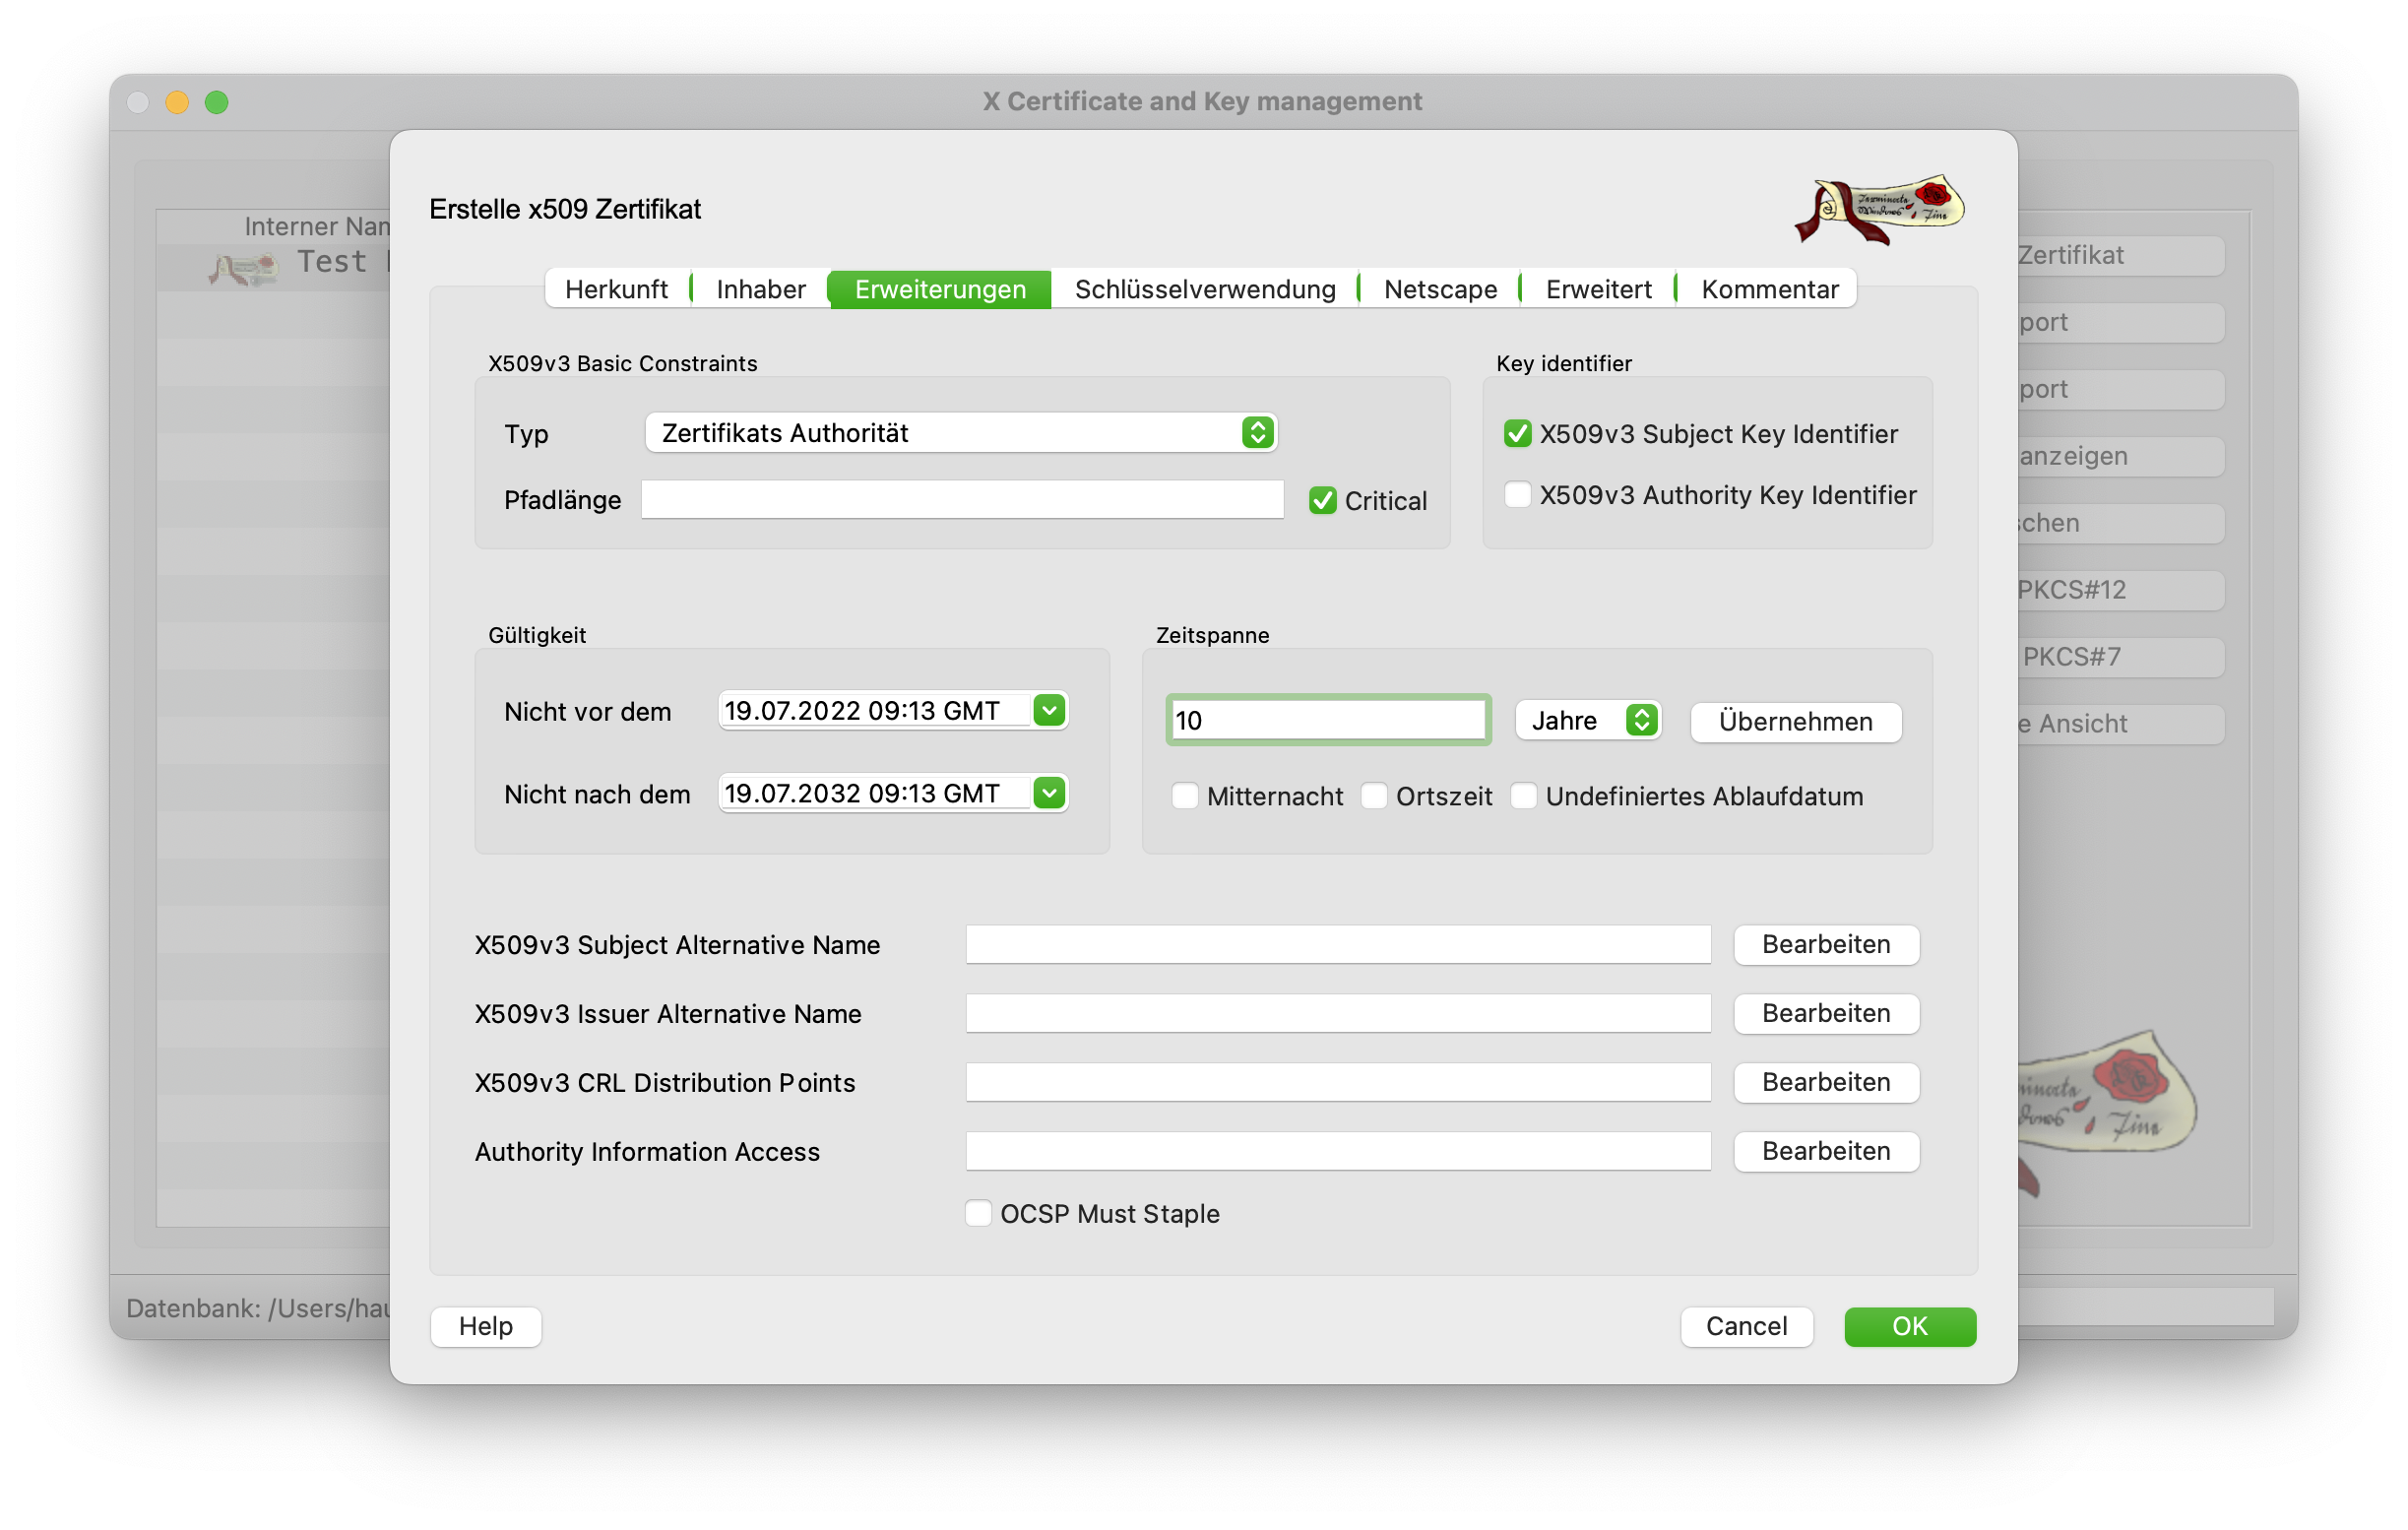
The validity period must also be changed accordingly in the Extensions tab. It is recommended to use a shorter period than that of the Root CA. As a rule, half the time of the Root CA.
This certificate is also created with Apply and OK and is now visible in the list. It is already clear here that a certificate chain has been created that builds on each other.
Creating server certificates #
Once the root and sub CA have been created, the corresponding server certificates can now be issued. These are then used by the browser for the encrypted connection between user and server.
The creation of such certificates is just as simple as for the CA certificates. Only the template for issuing them is different.
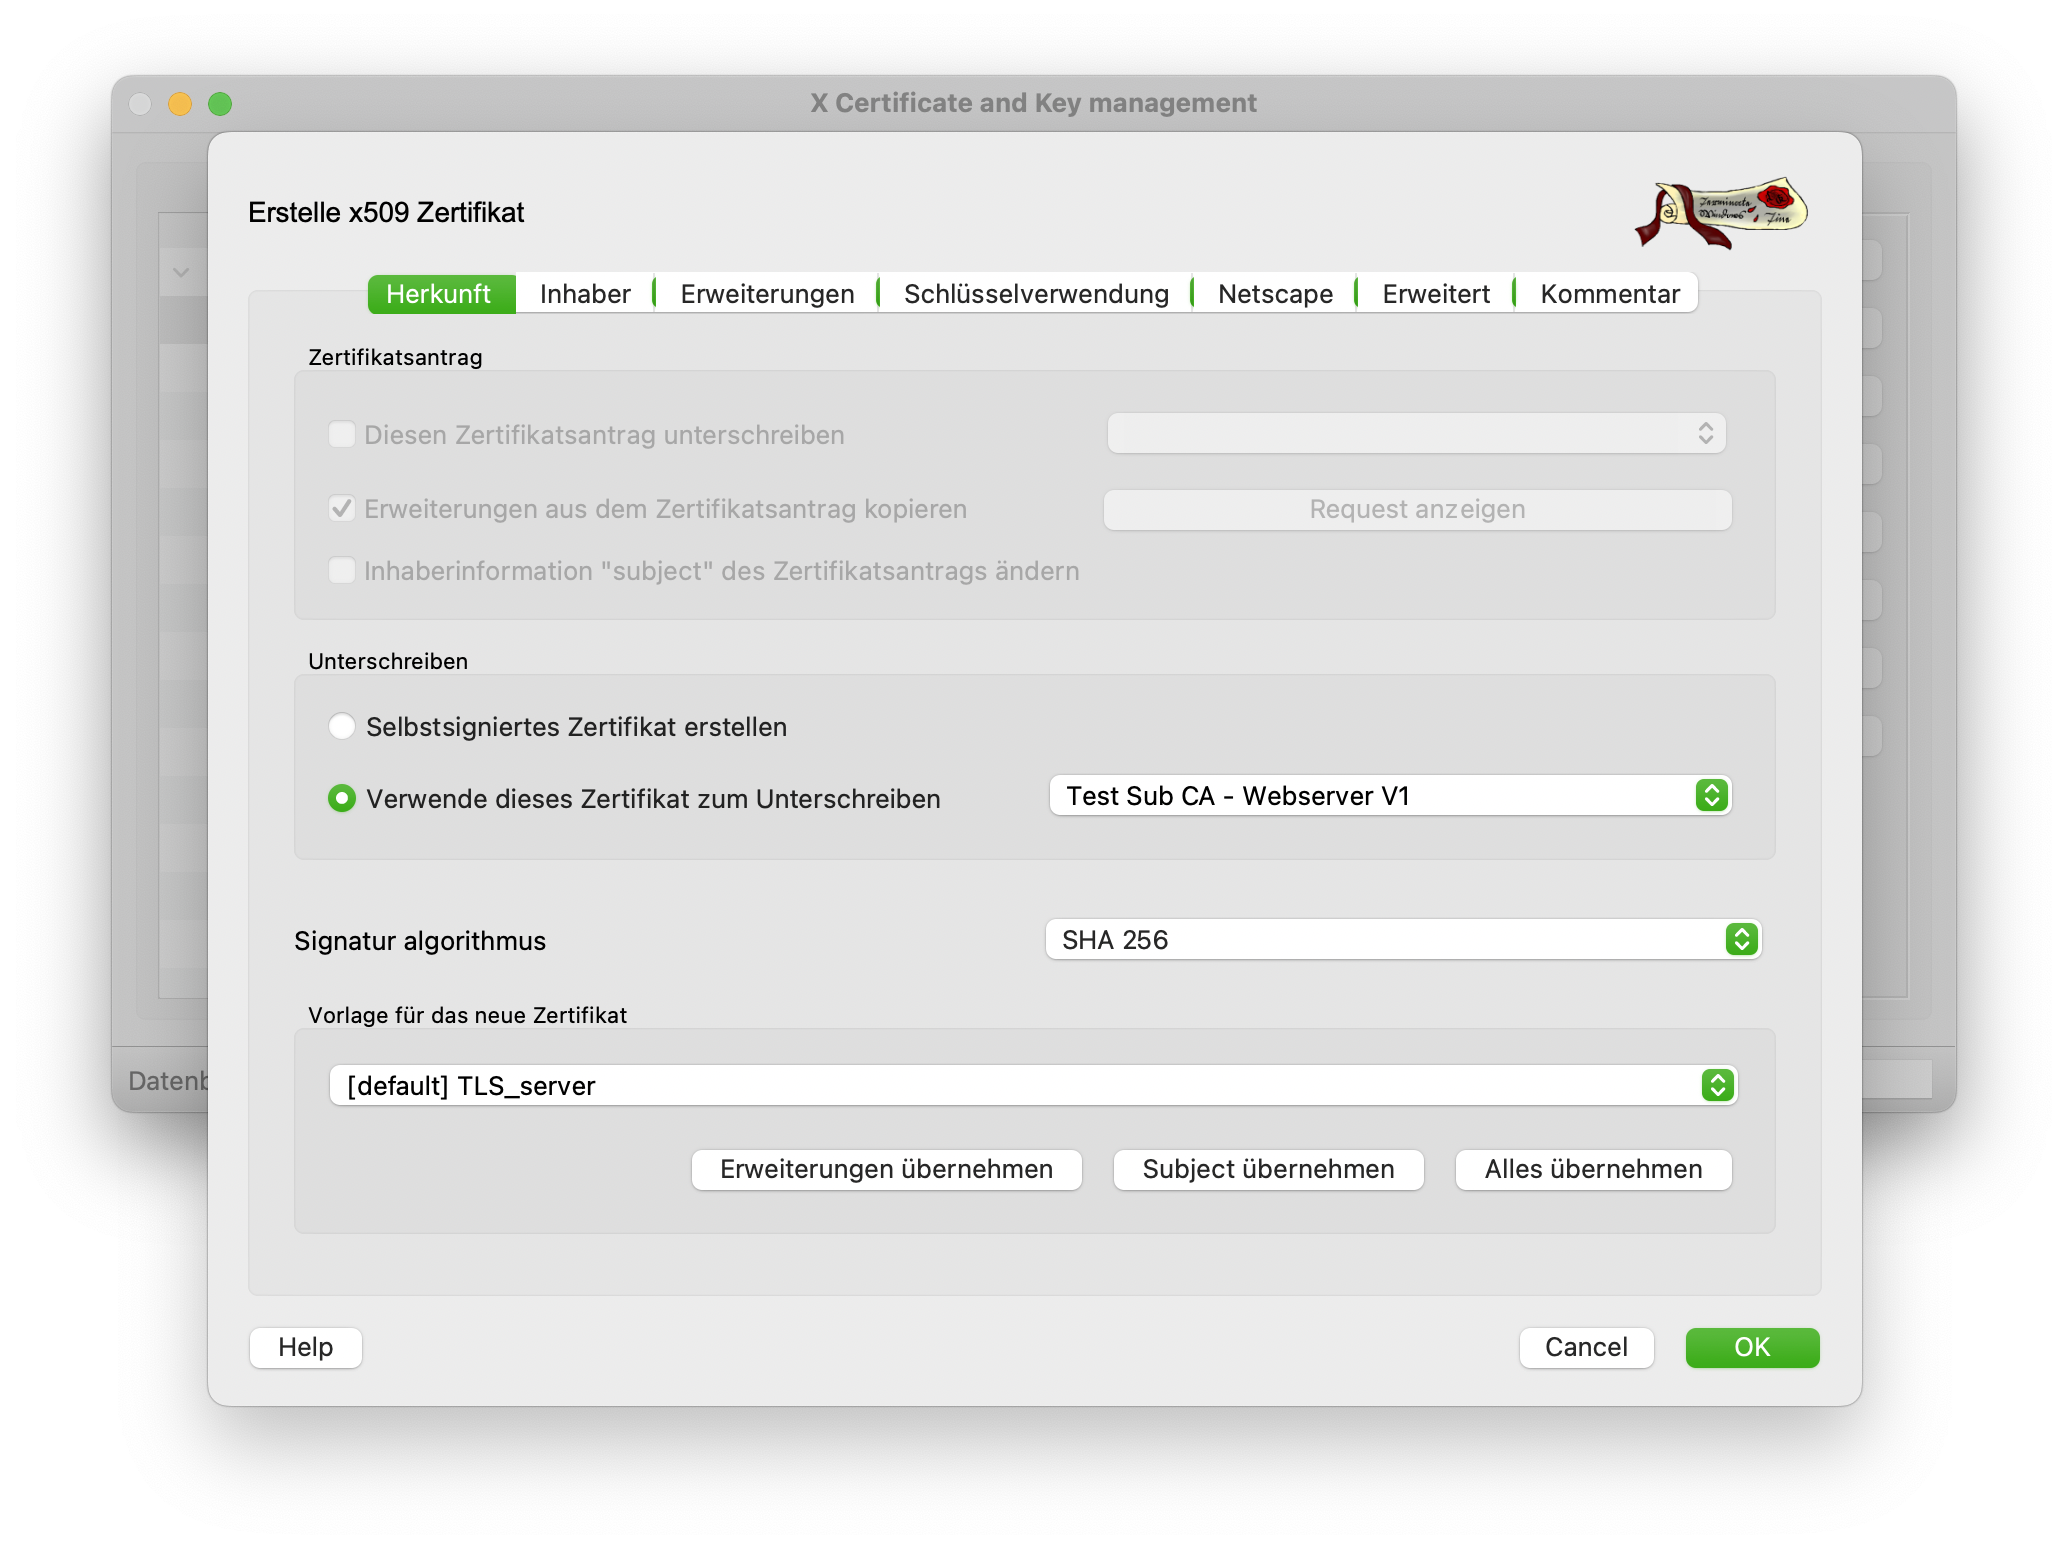
In the previous screenshot, TLS_Server is used as the template and the Sub CA is selected as the signing CA. The Owner tab is to be filled in similarly to the CA certificates.
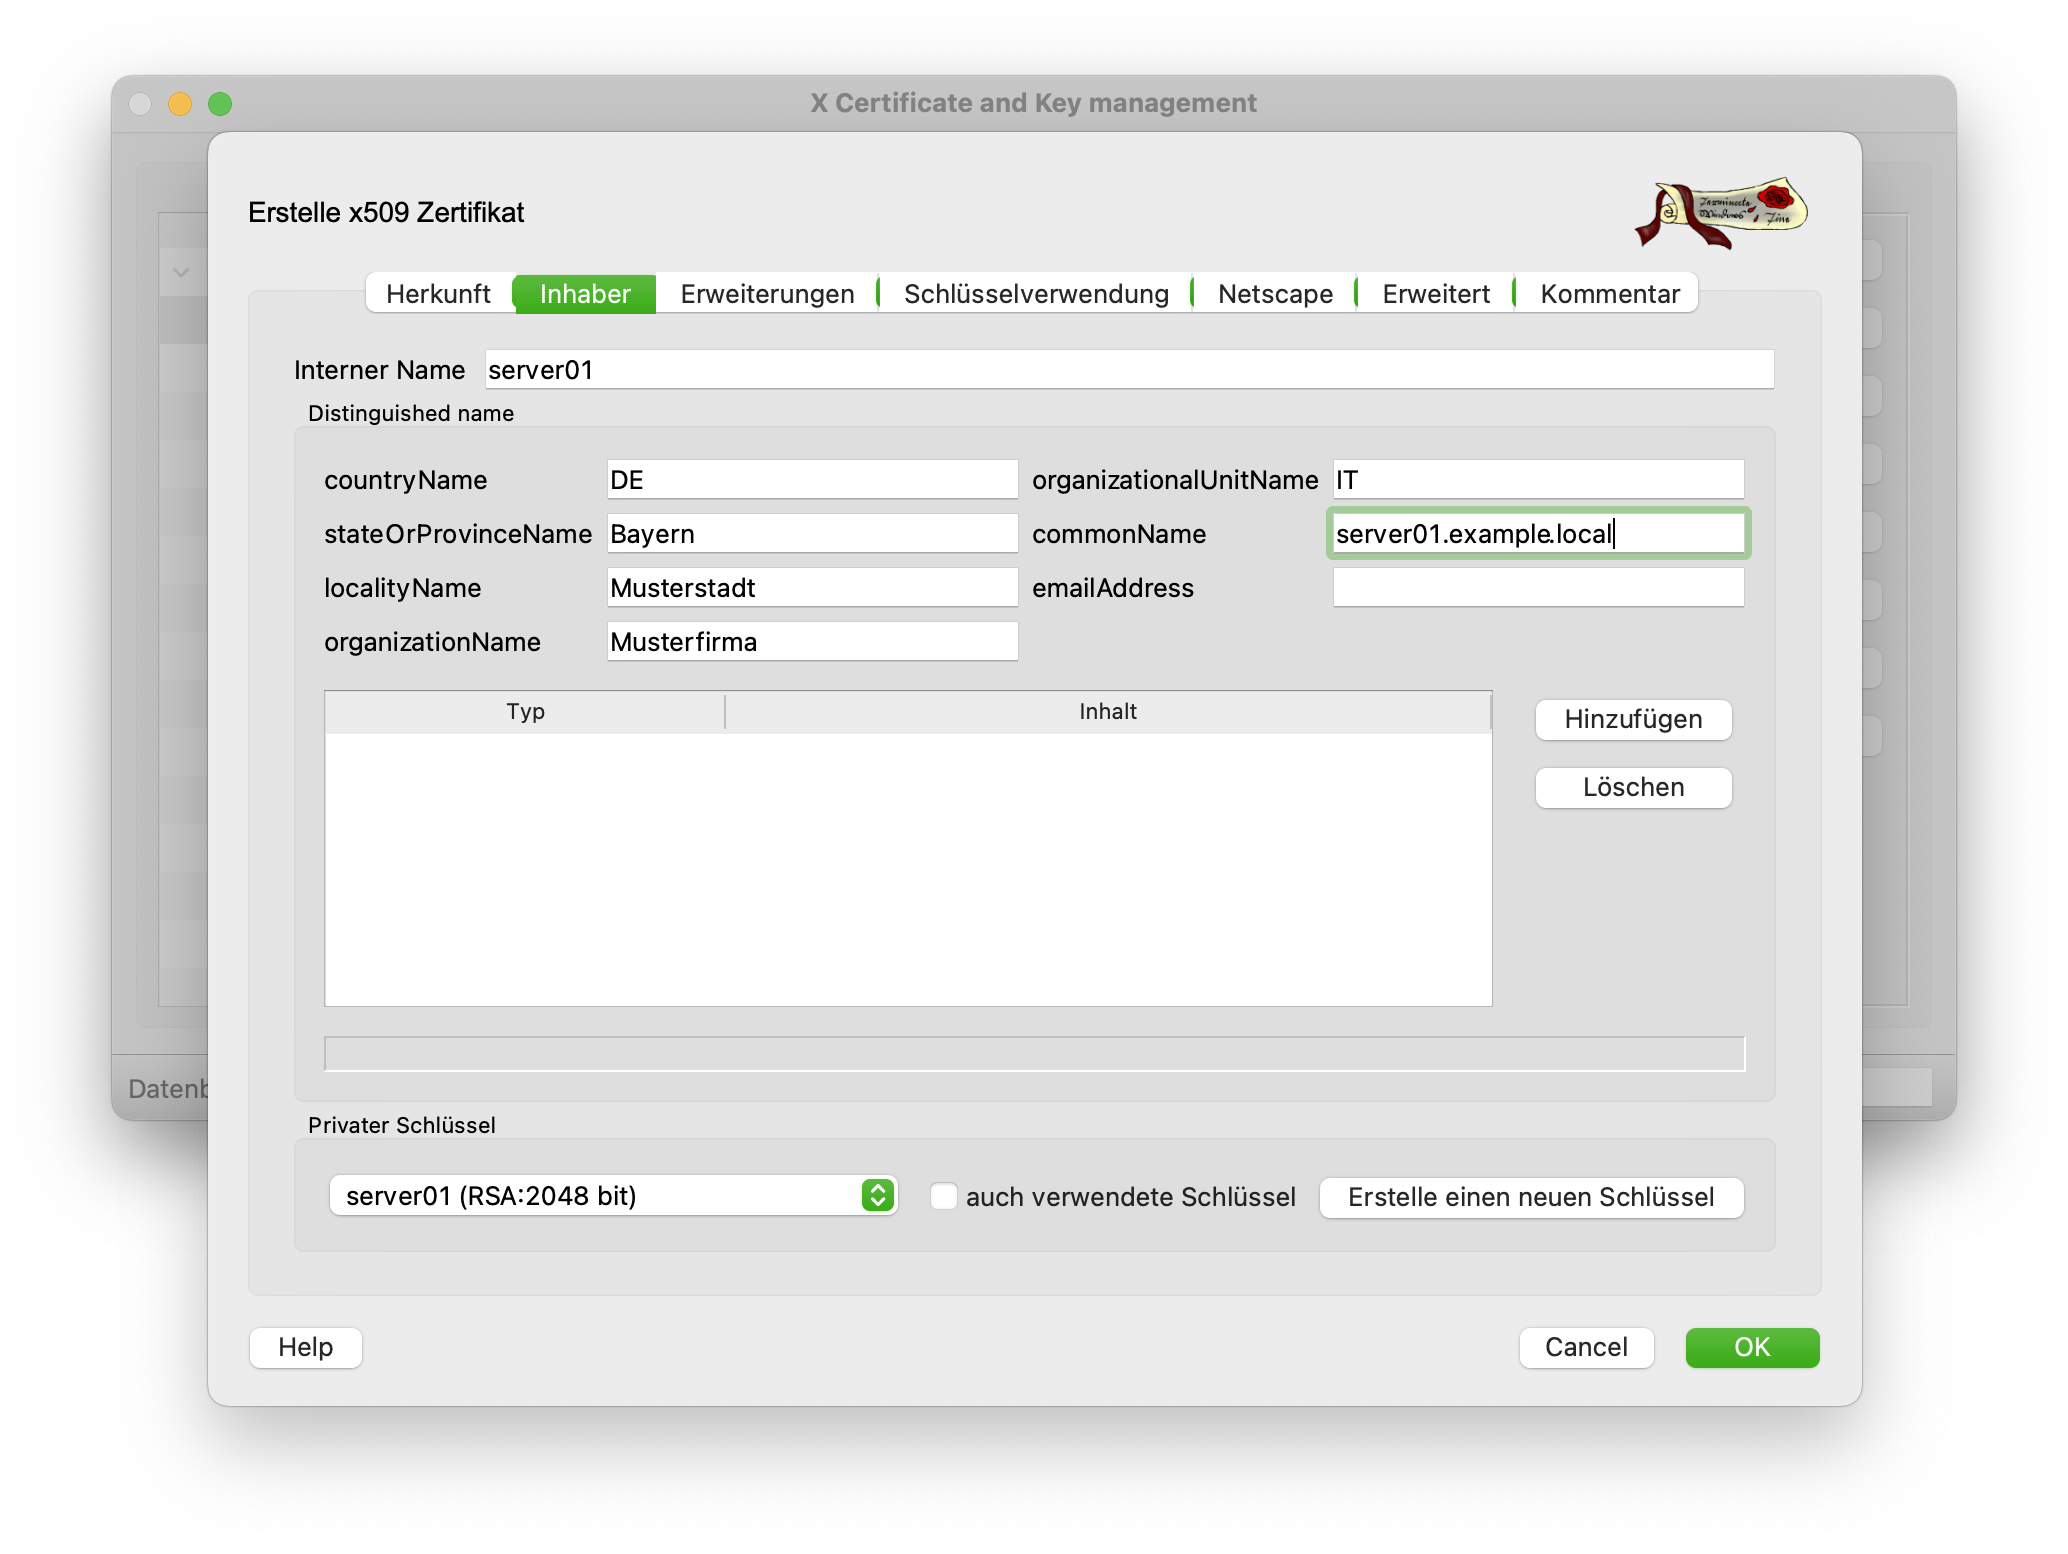
However, the internal name and the common name are particularly important here. The CN MUST contain the FQDN. The internal name is freely selectable, but should refer to the host name of the server. When creating the key for this certificate, a 2048-bit key length is sufficient.
In the Advanced tab, other settings are made in addition to the validity period. There should be at least three entries under Subject Alternative Name. Firstly, the FQDN (this is automatically filled in by the existing entry), as well as the host name (DNS:hostname) and an IP (IP:10.10.10.20).
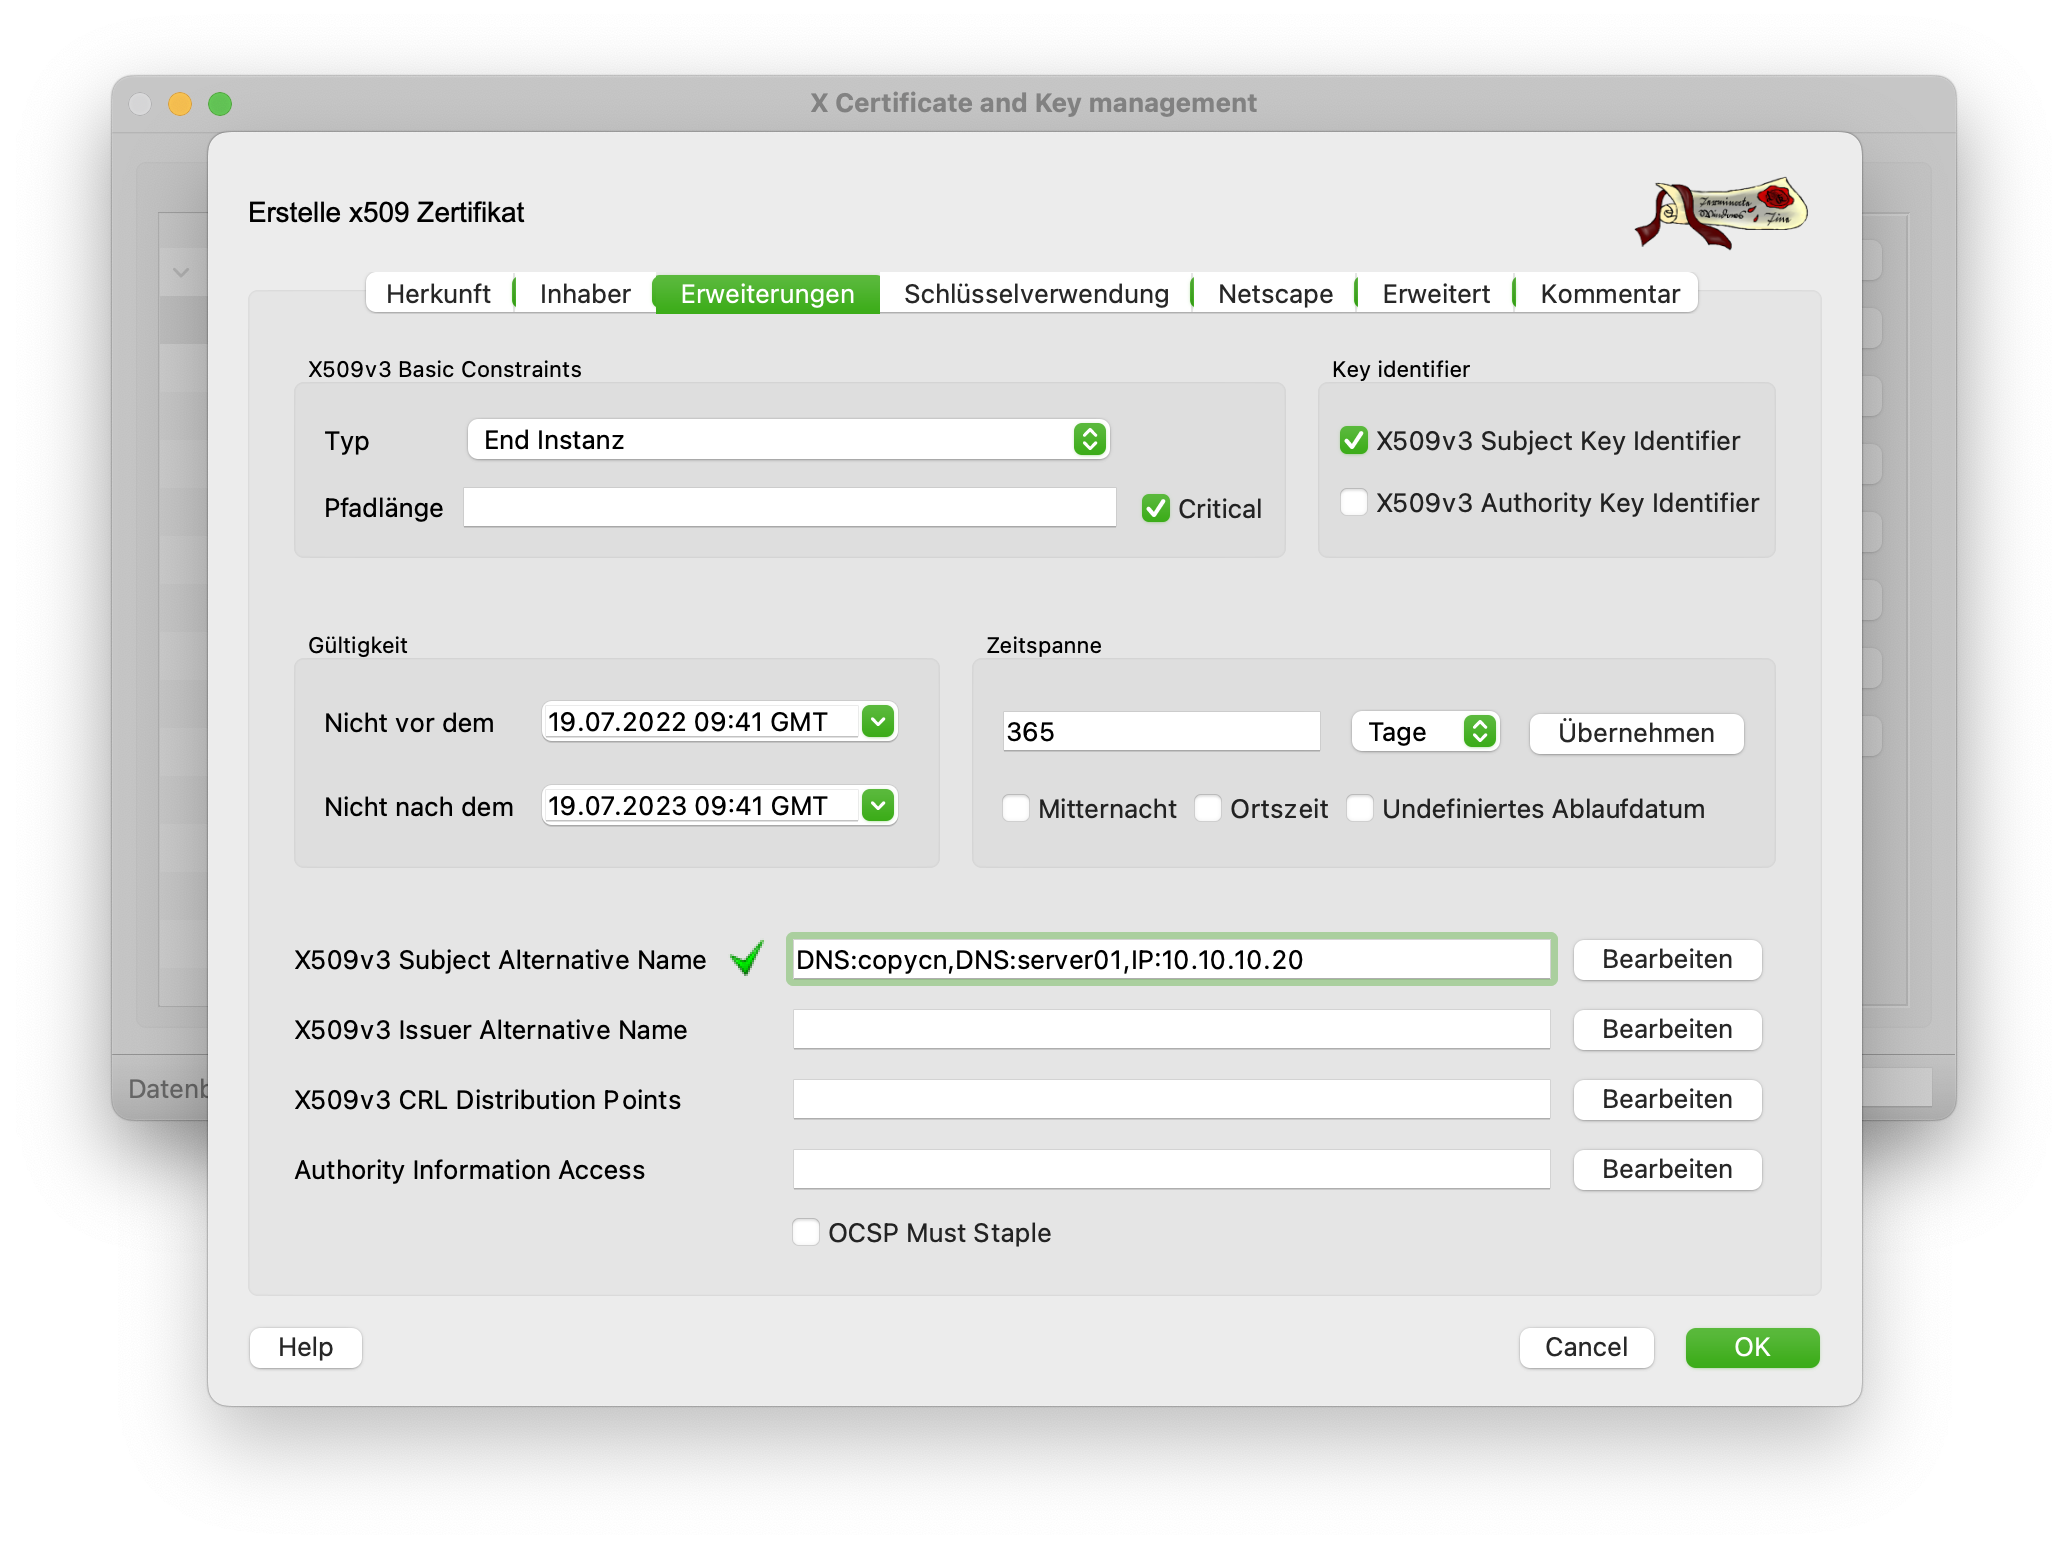
After this step, the certificate can be created again with OK.
Conclusion #
Setting up and configuring your own PKI with the XCA tool is very simple and straightforward. All certificates and keys are stored securely in a database and are password-protected. If you want to be absolutely sure that the Root CA is not compromised, create a separate database for the Root CA and for the Sub CA and store them separately from each other and with different passwords.
Setting up separate CAs is not noticeably more difficult. After creating the Sub CA, it is simply exported with the corresponding certificate and key files as PKCS12 (.pfx file) and a new database is created. The CA is then imported here again and can then be used to sign server or client certificates.
Certificates and key files can be exported very easily and can then be imported again as a file on web servers.